1970 Dodge Charger R/T
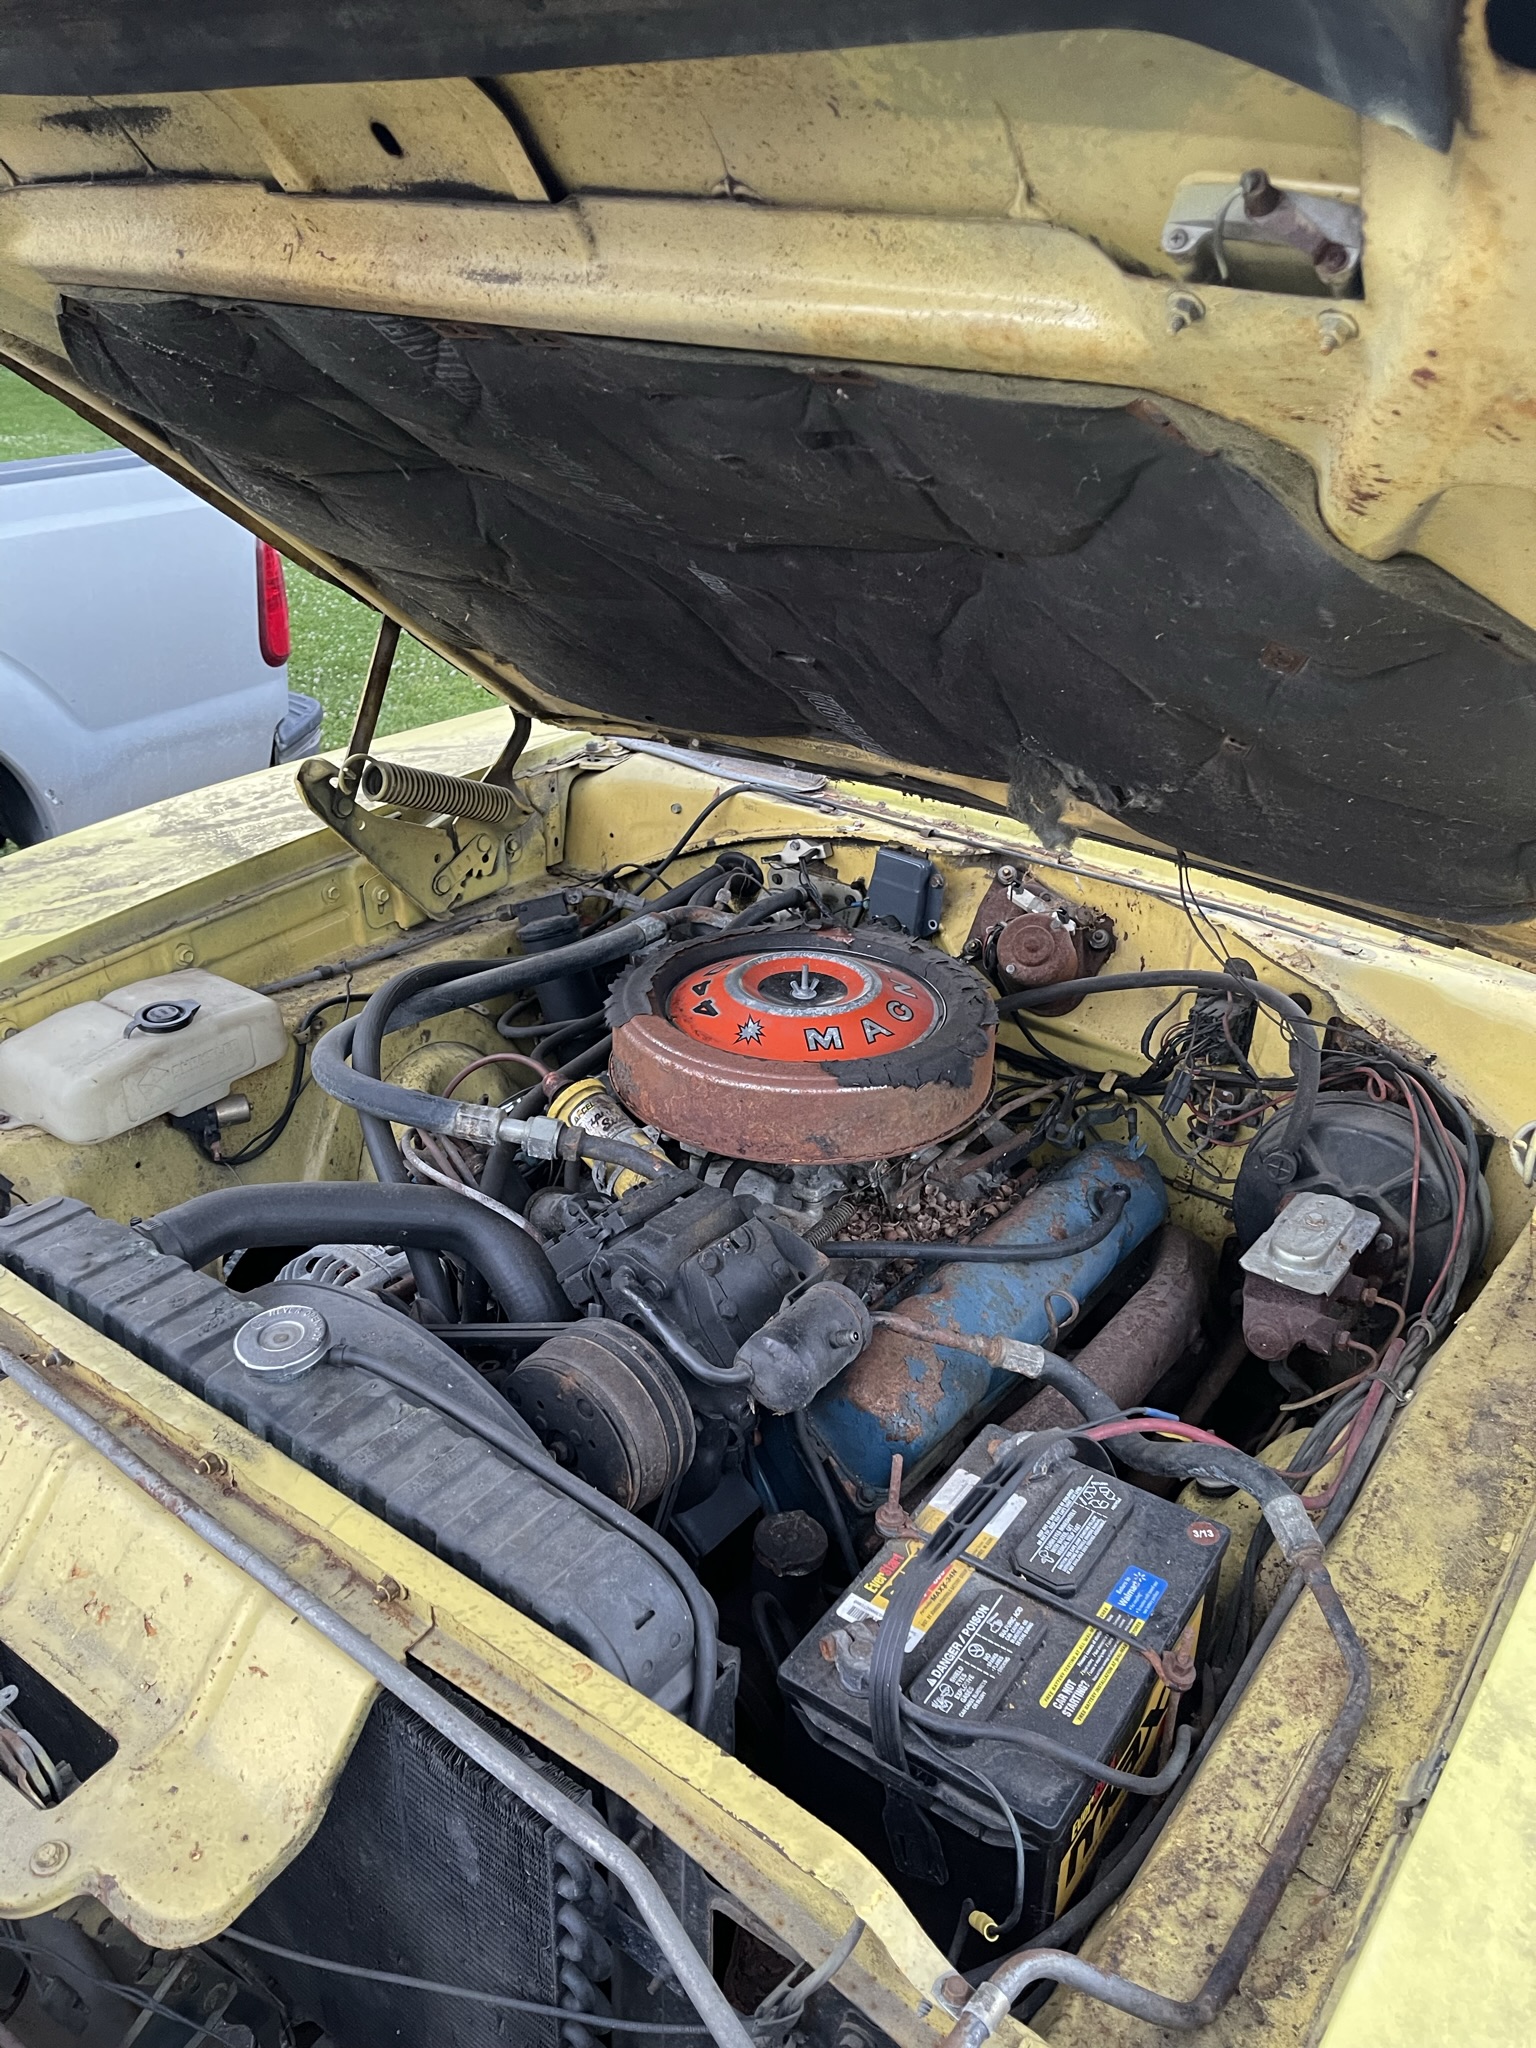
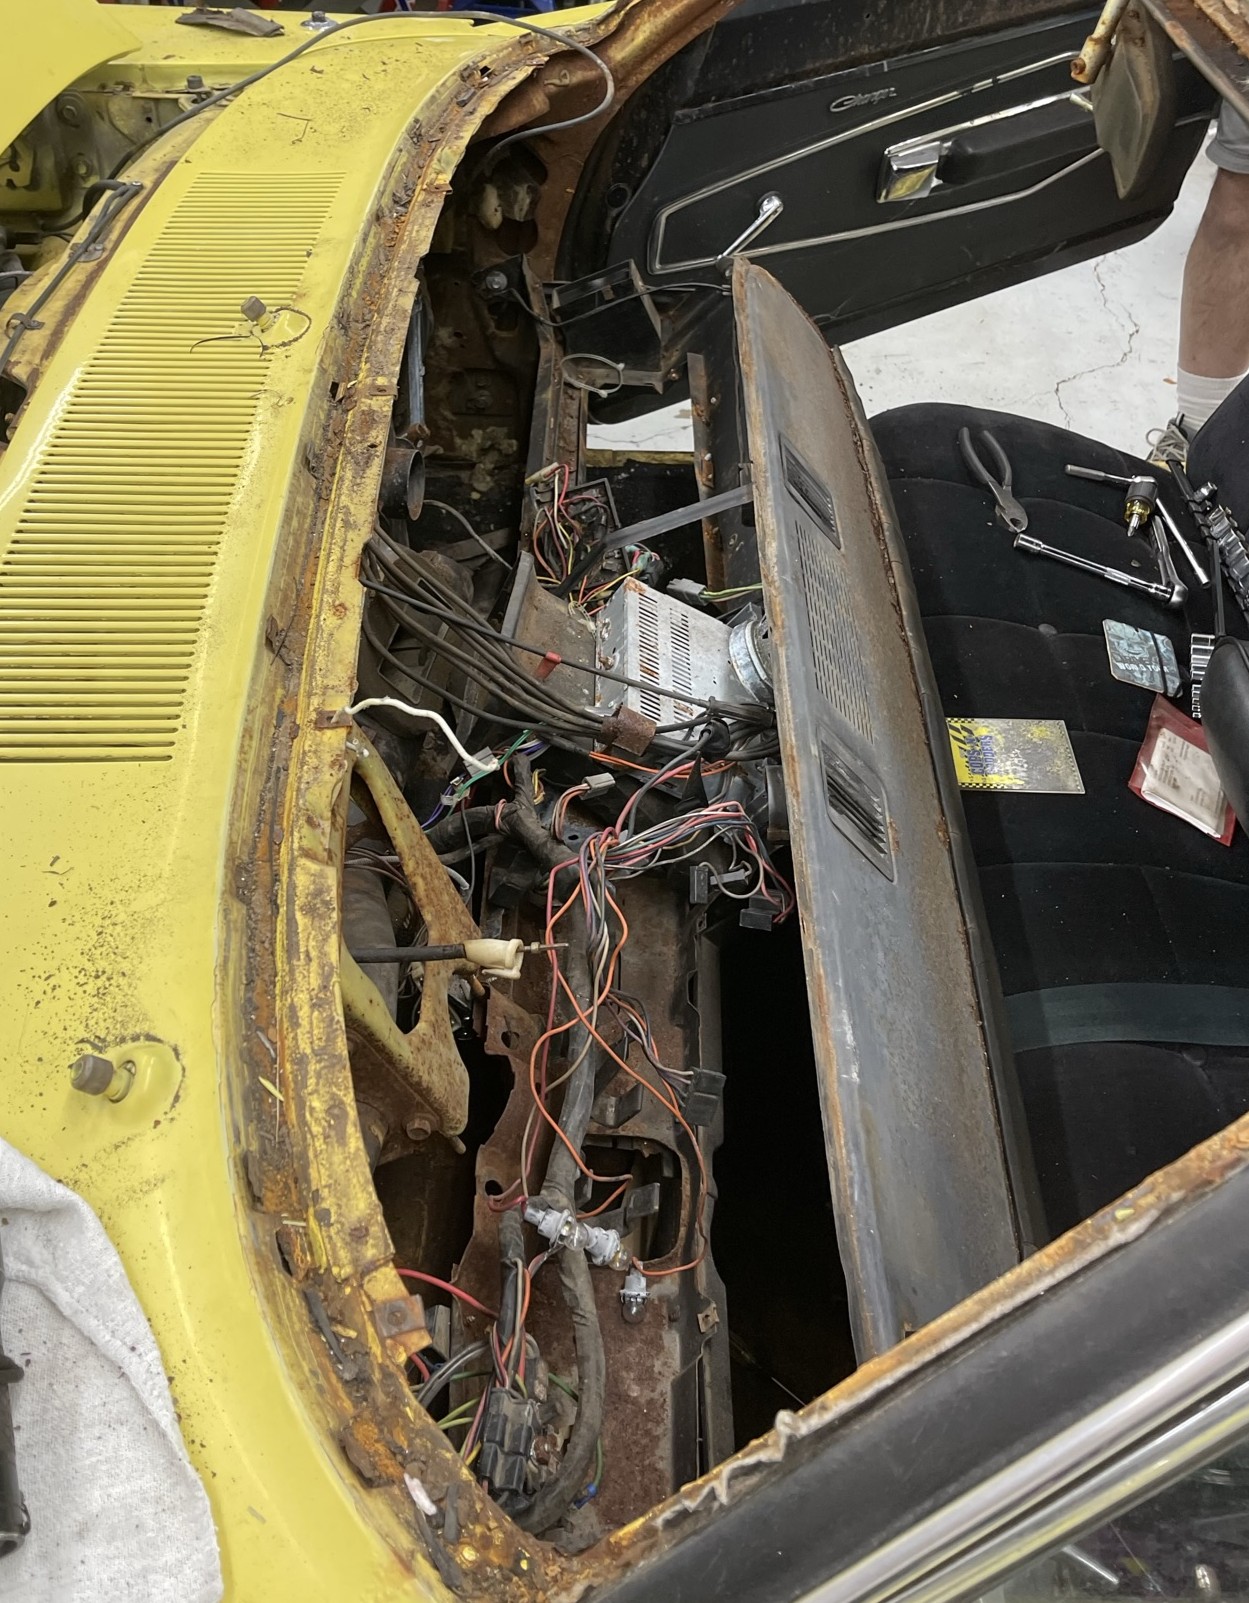
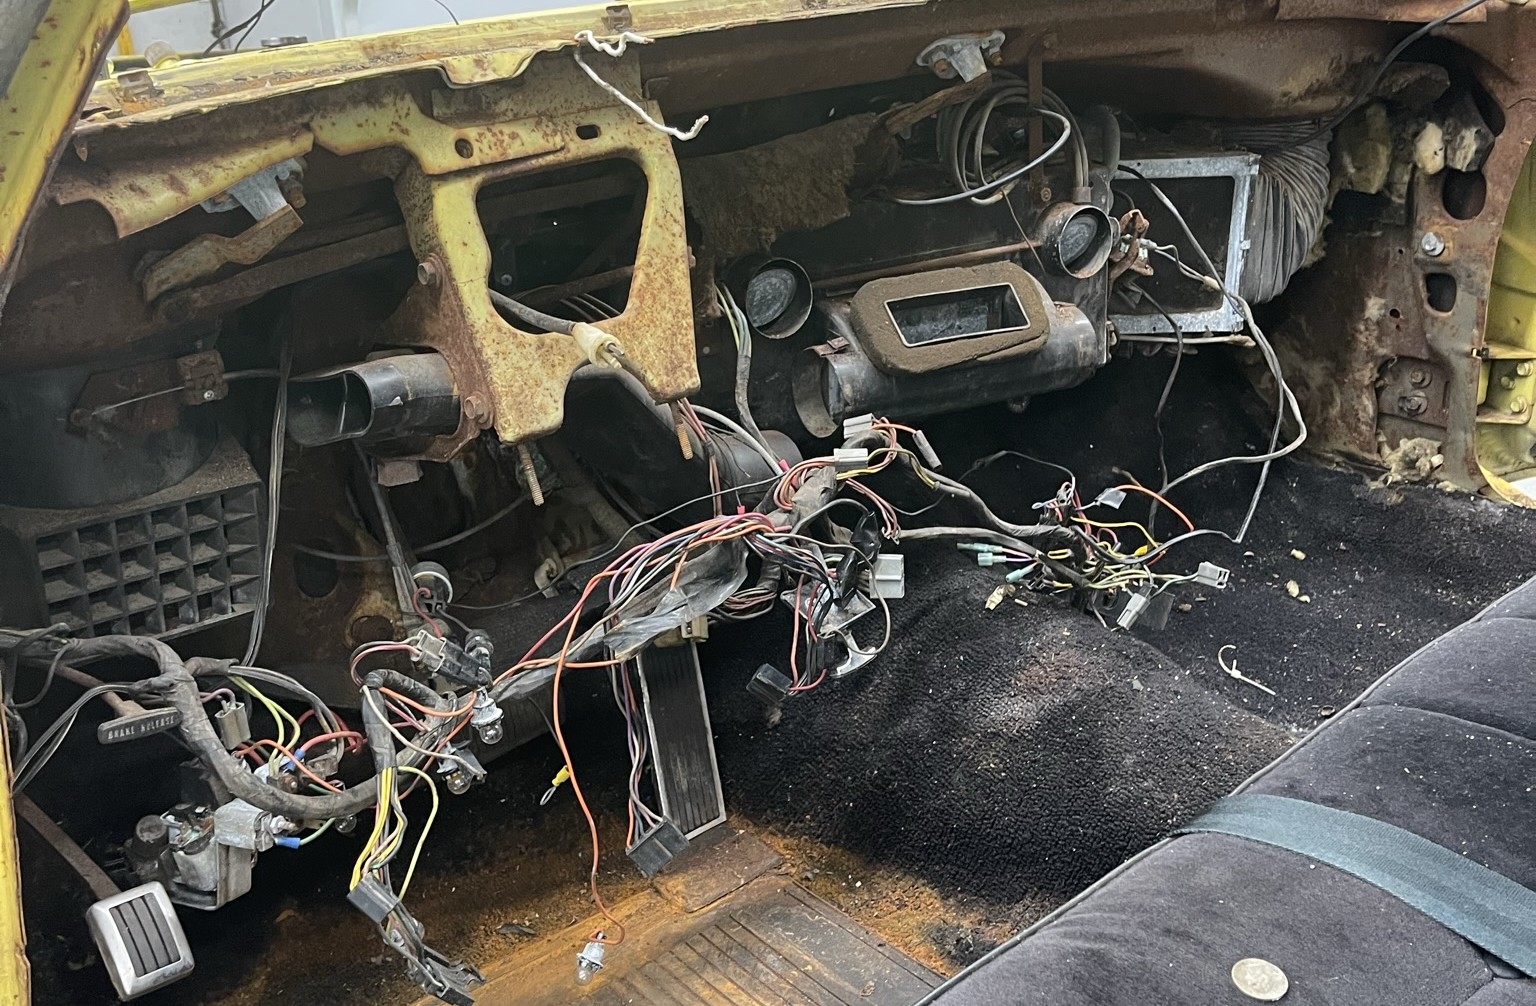
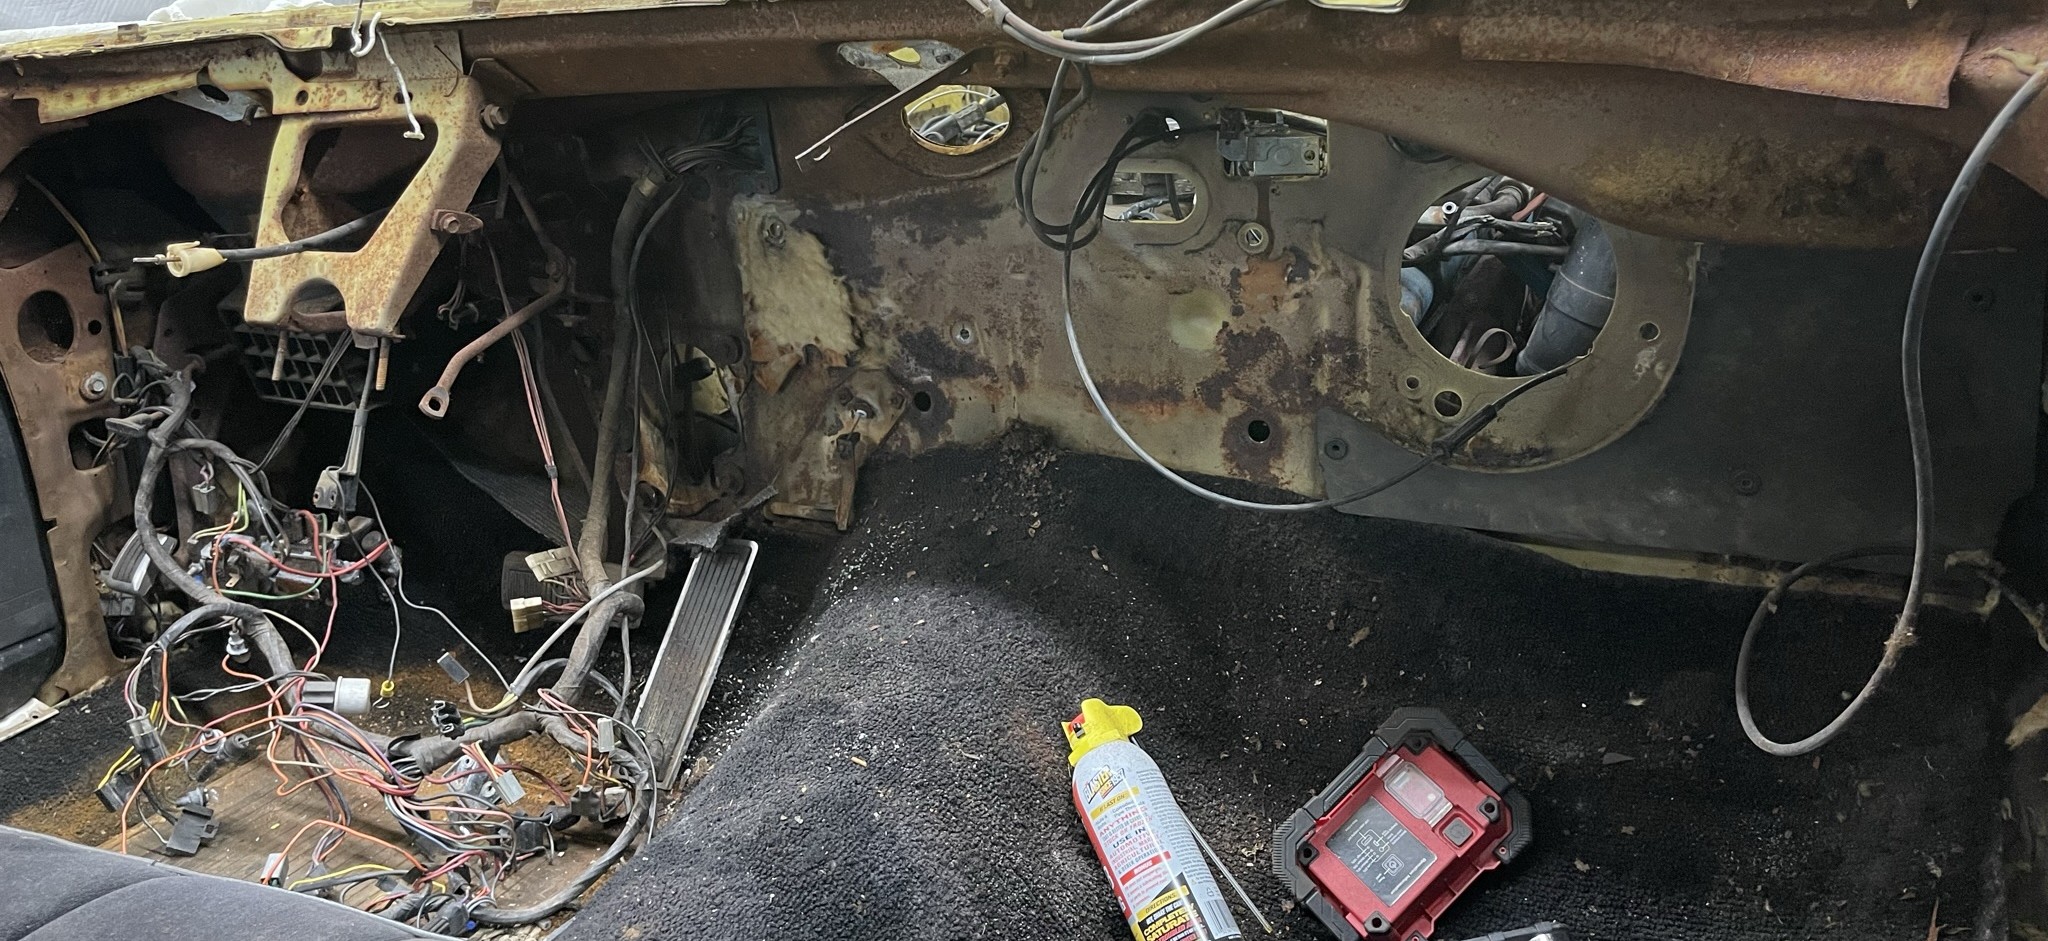
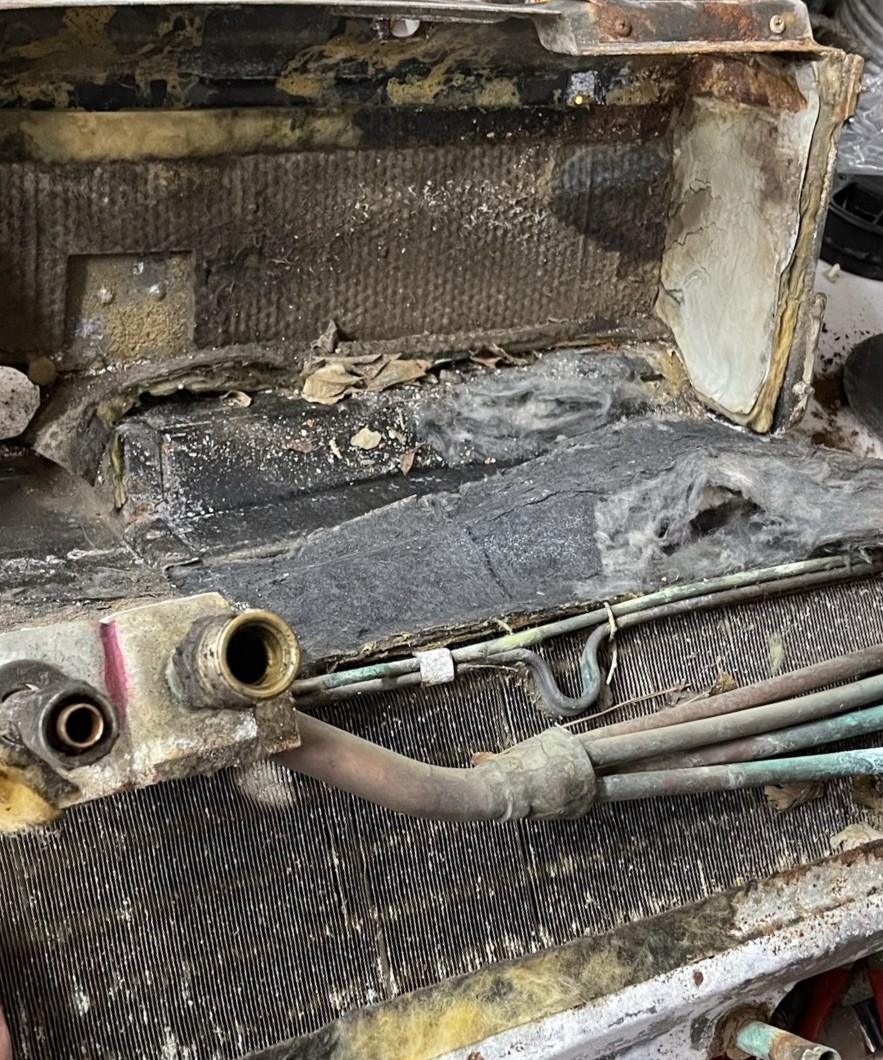
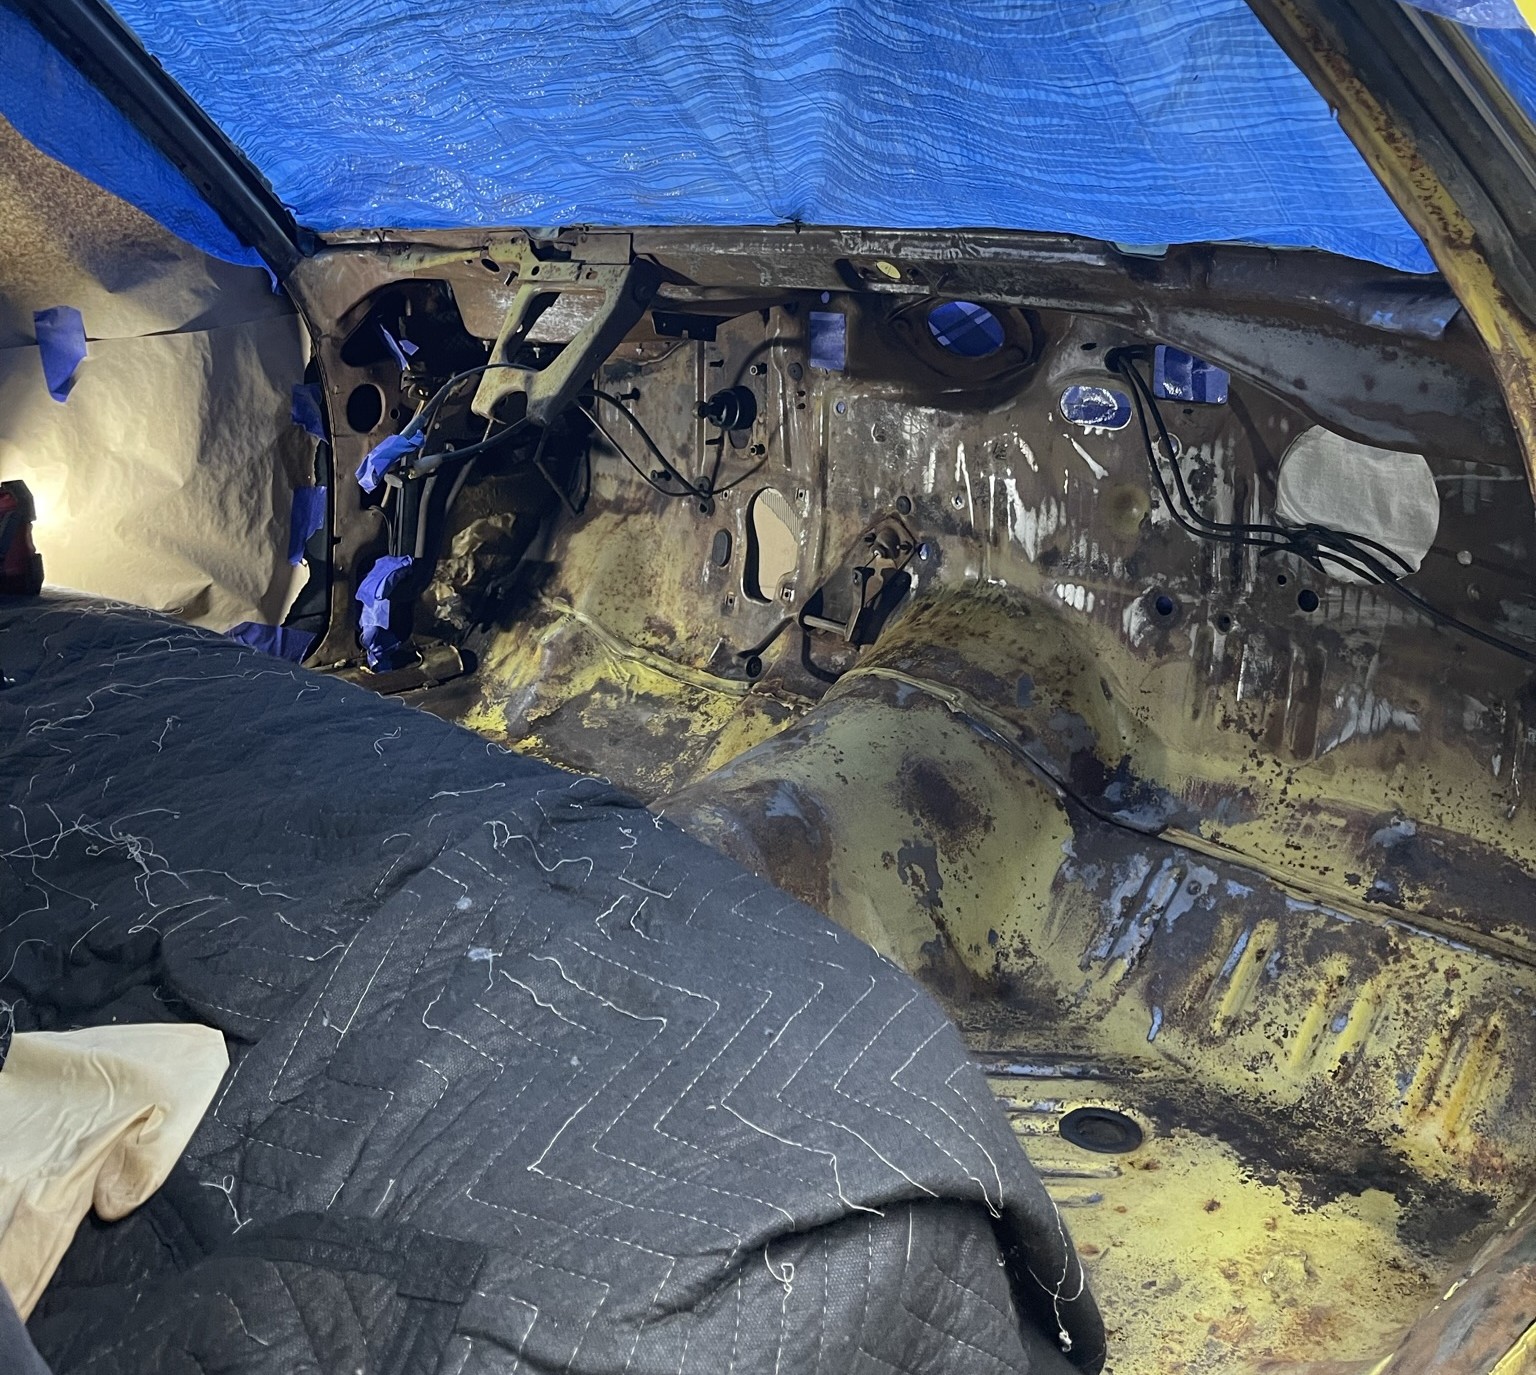
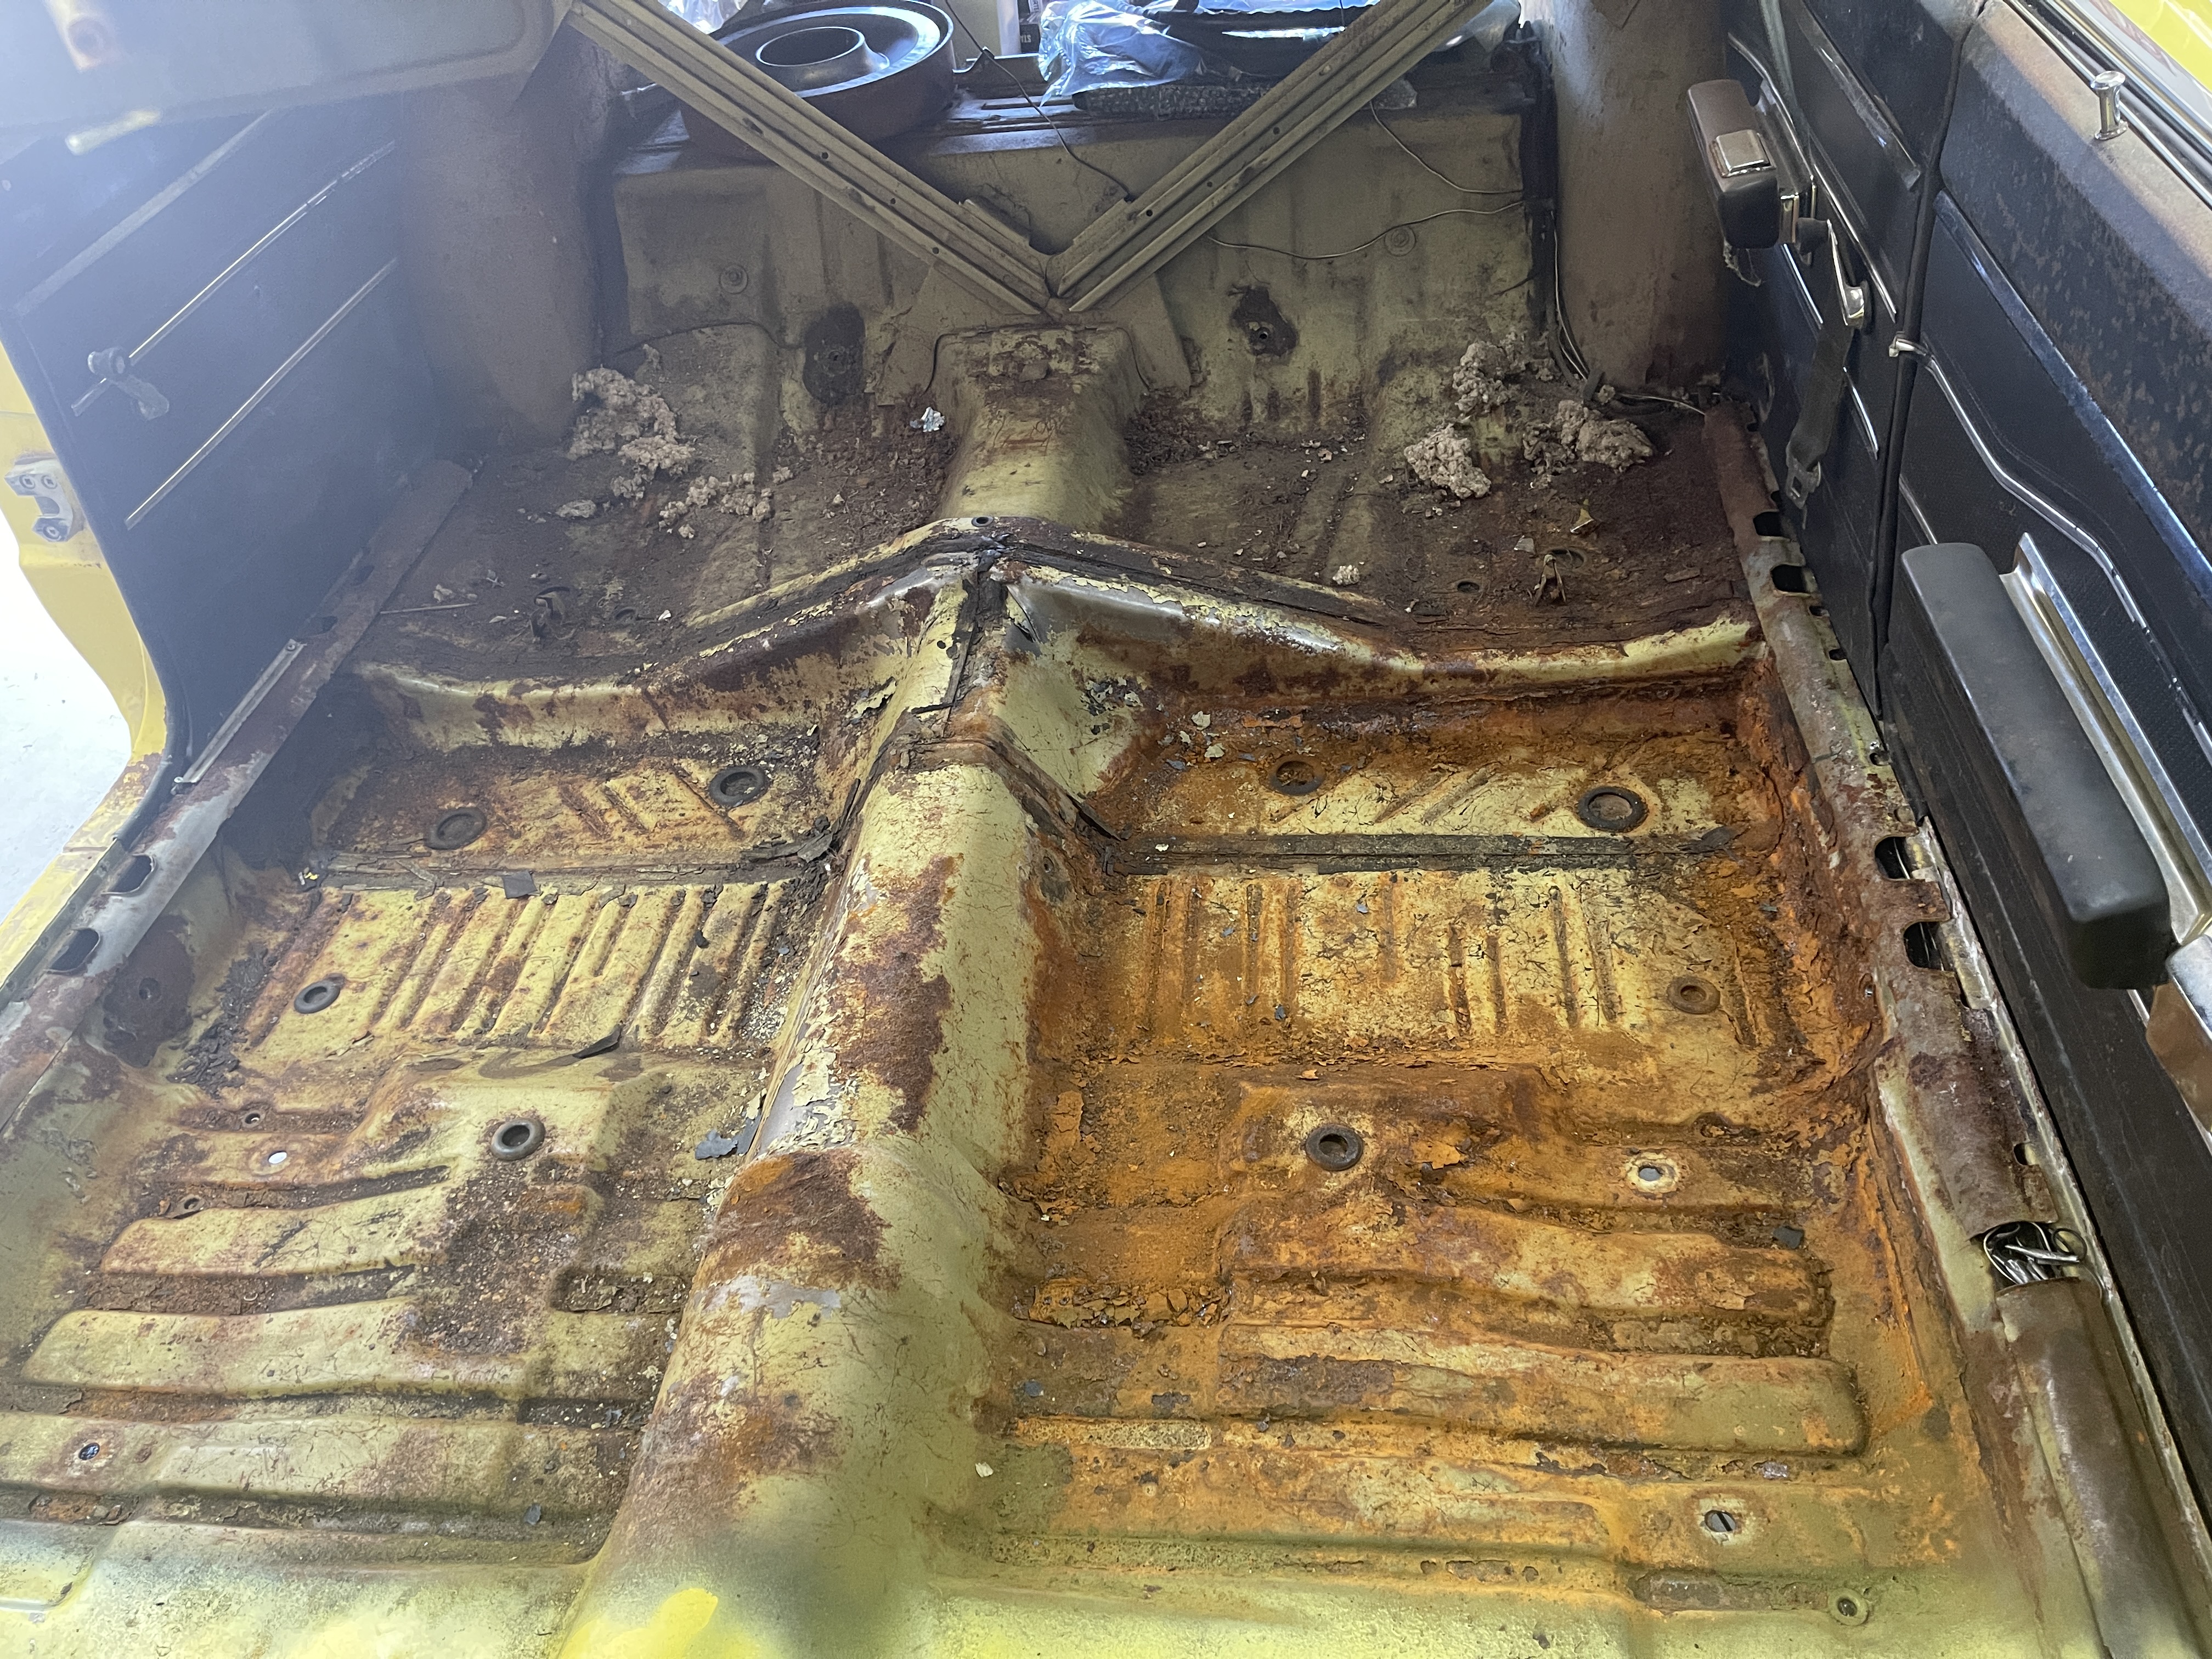
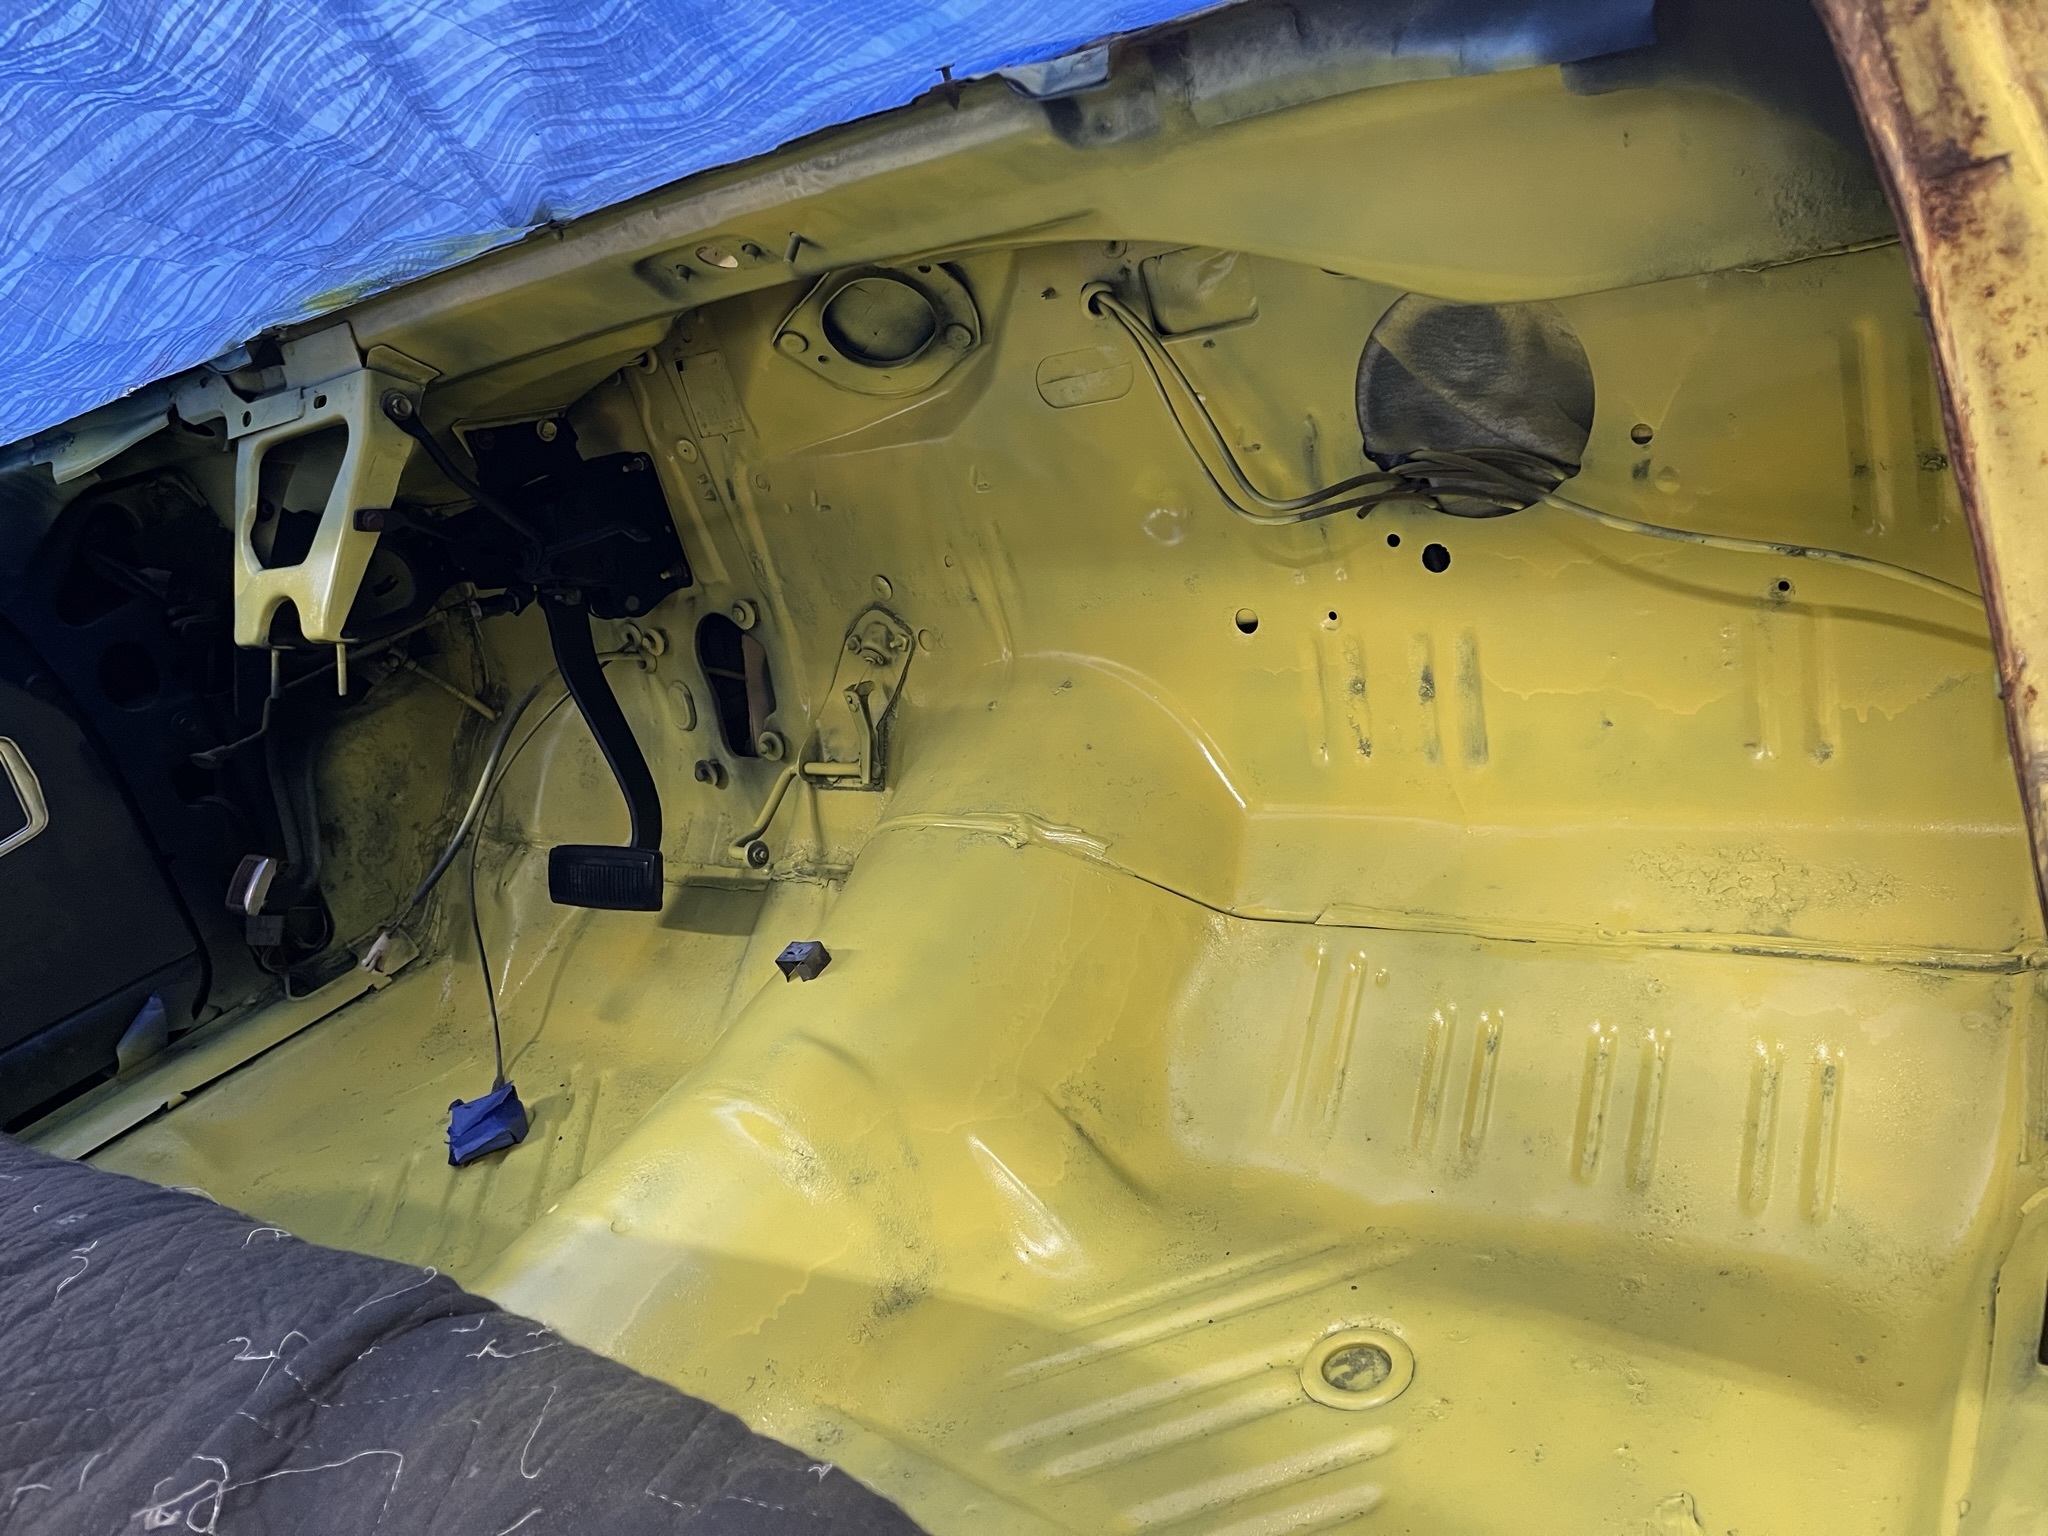
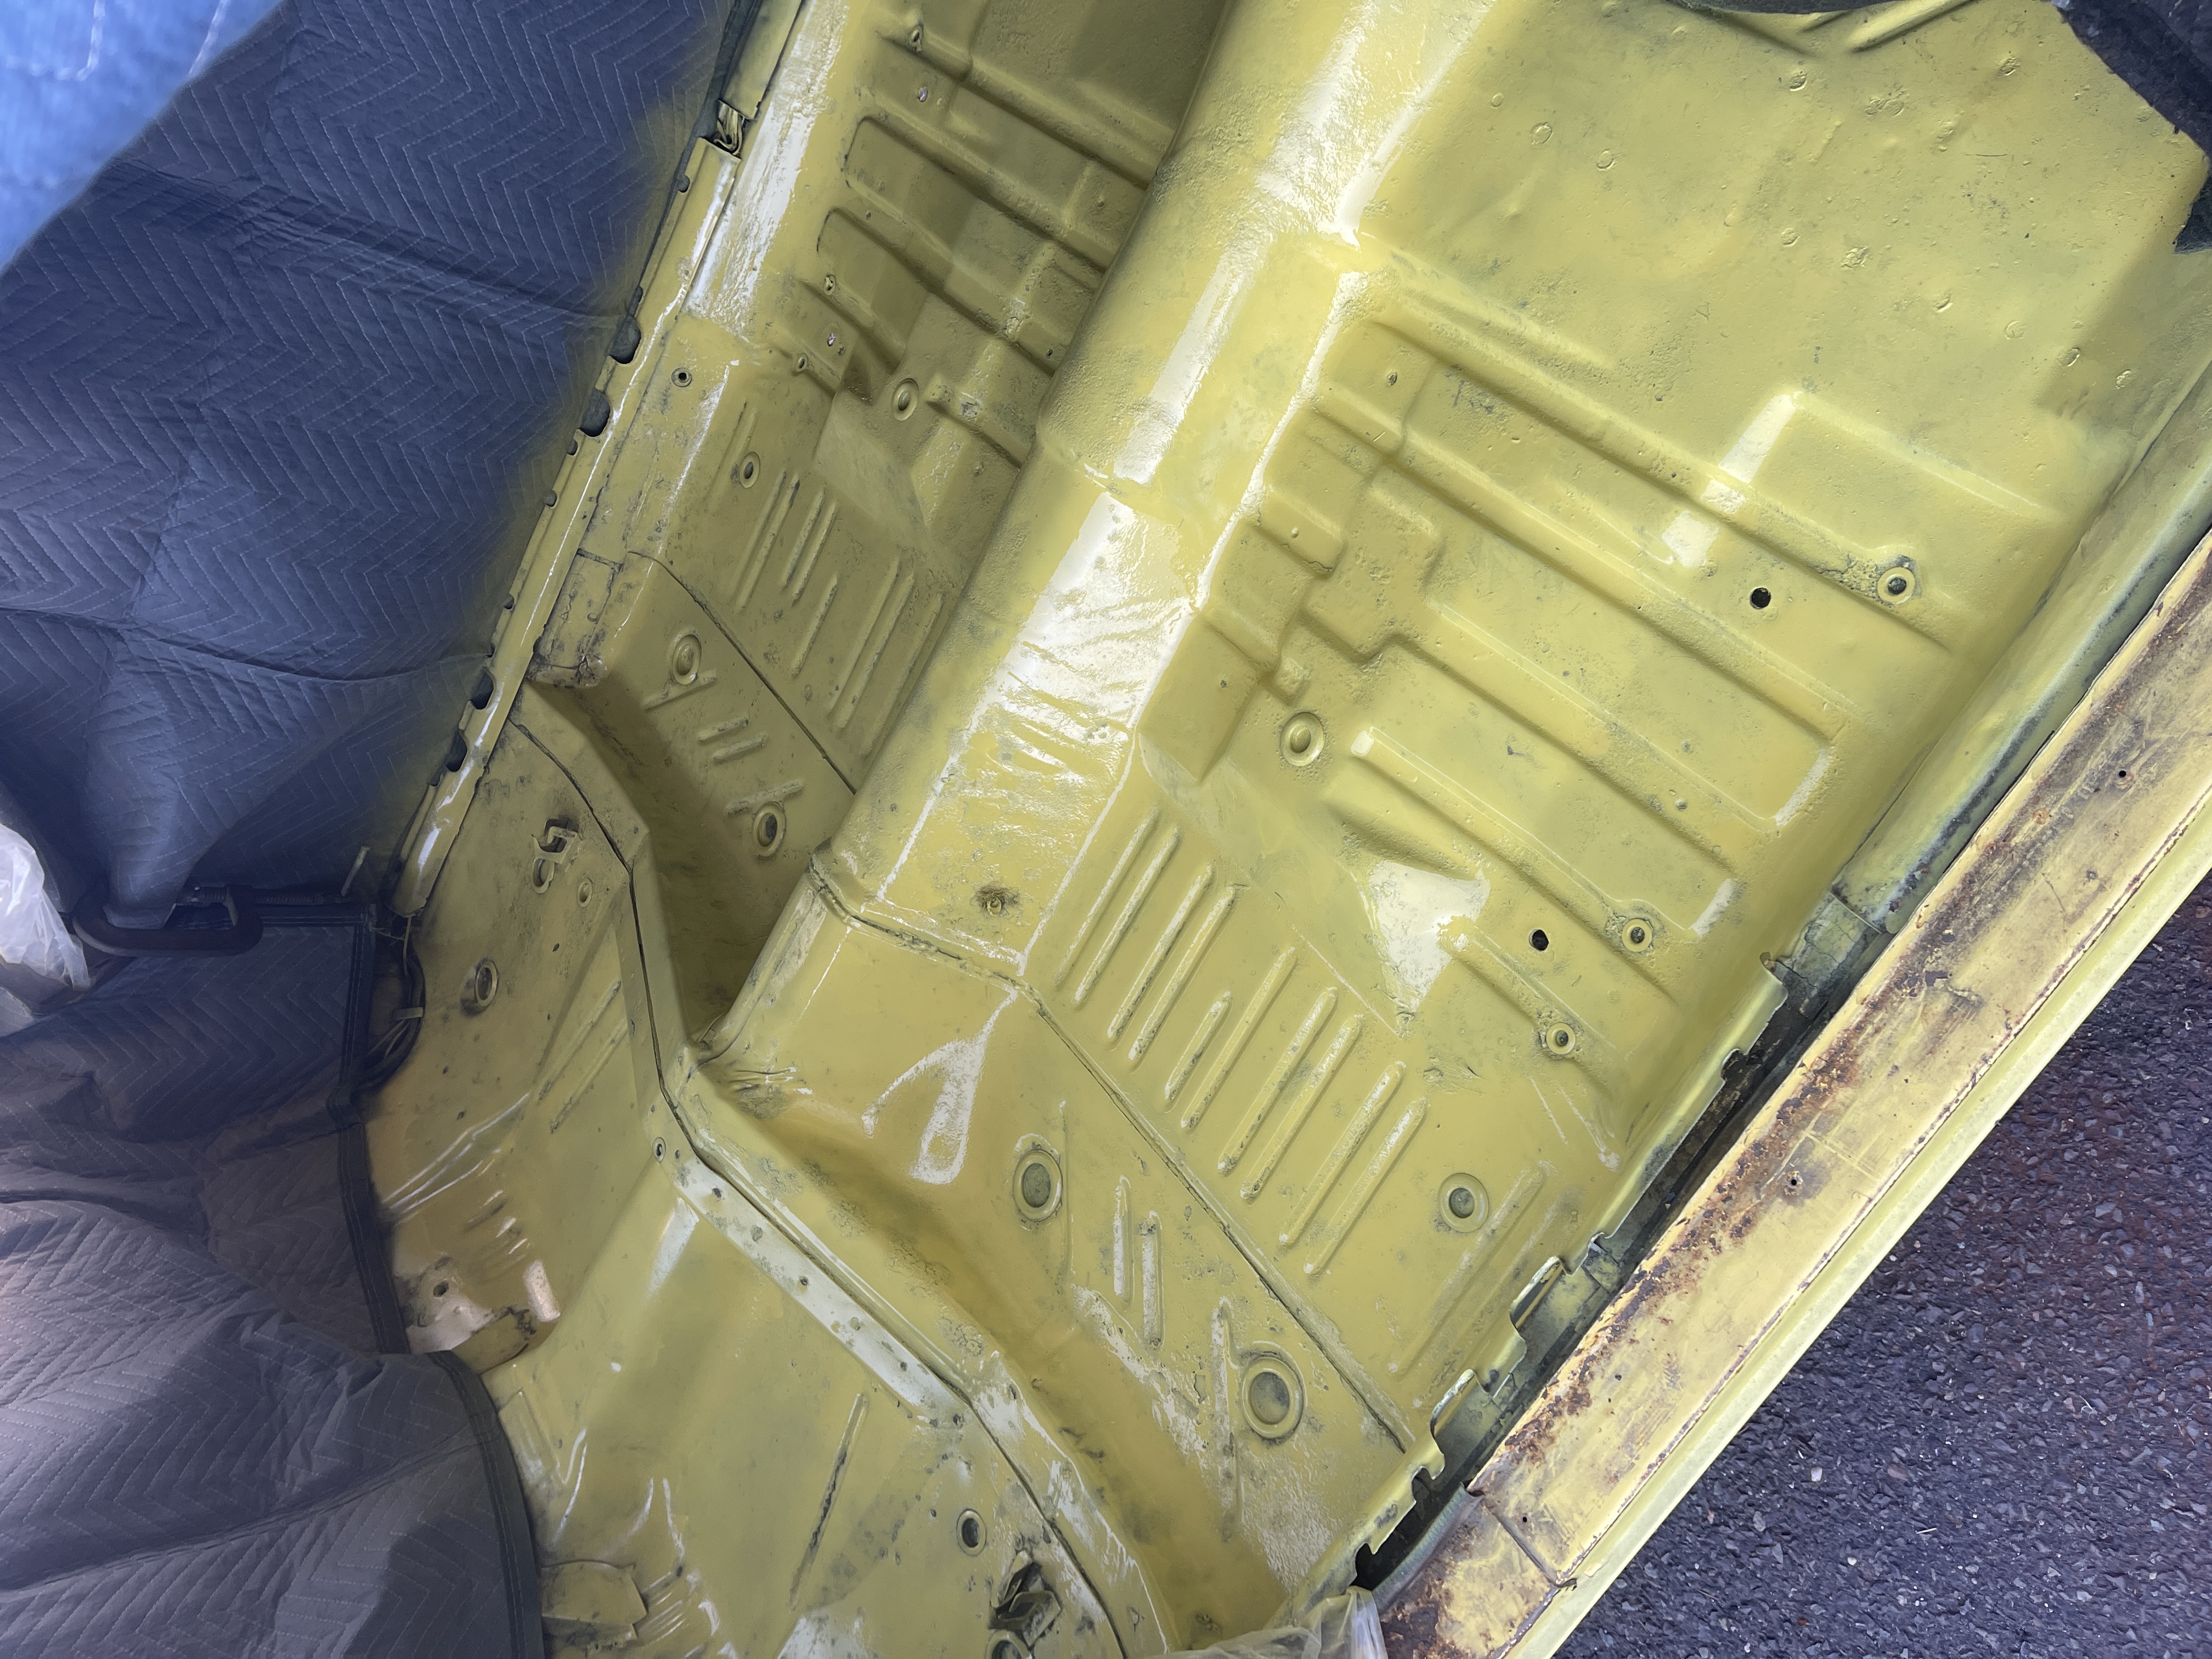
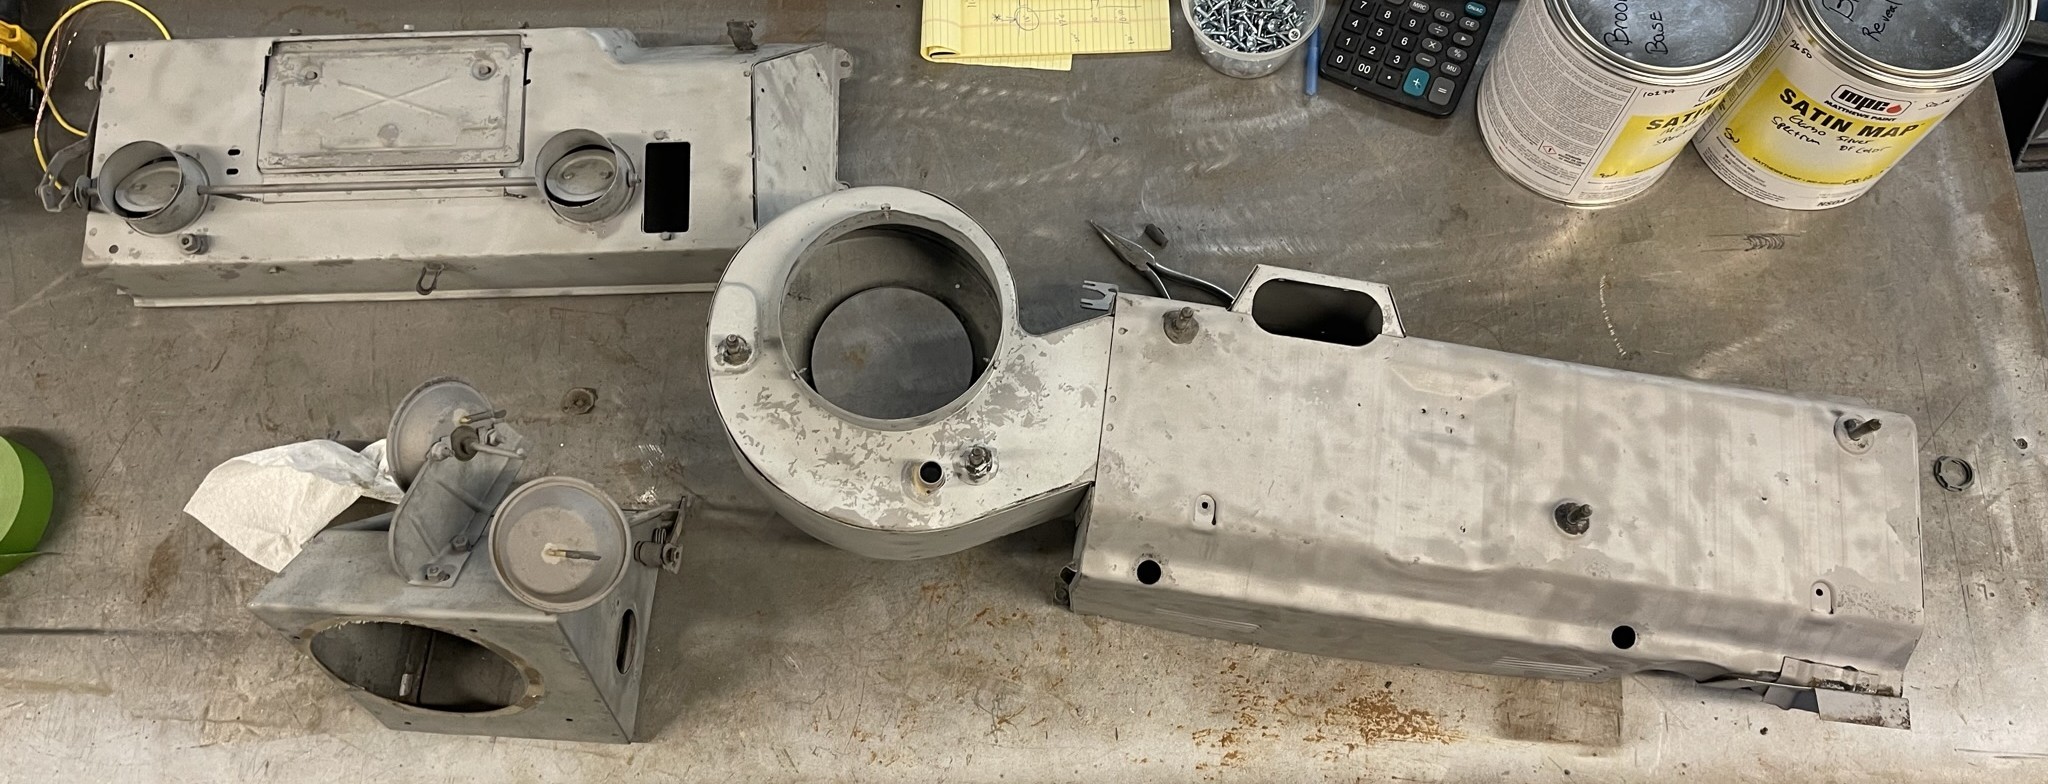
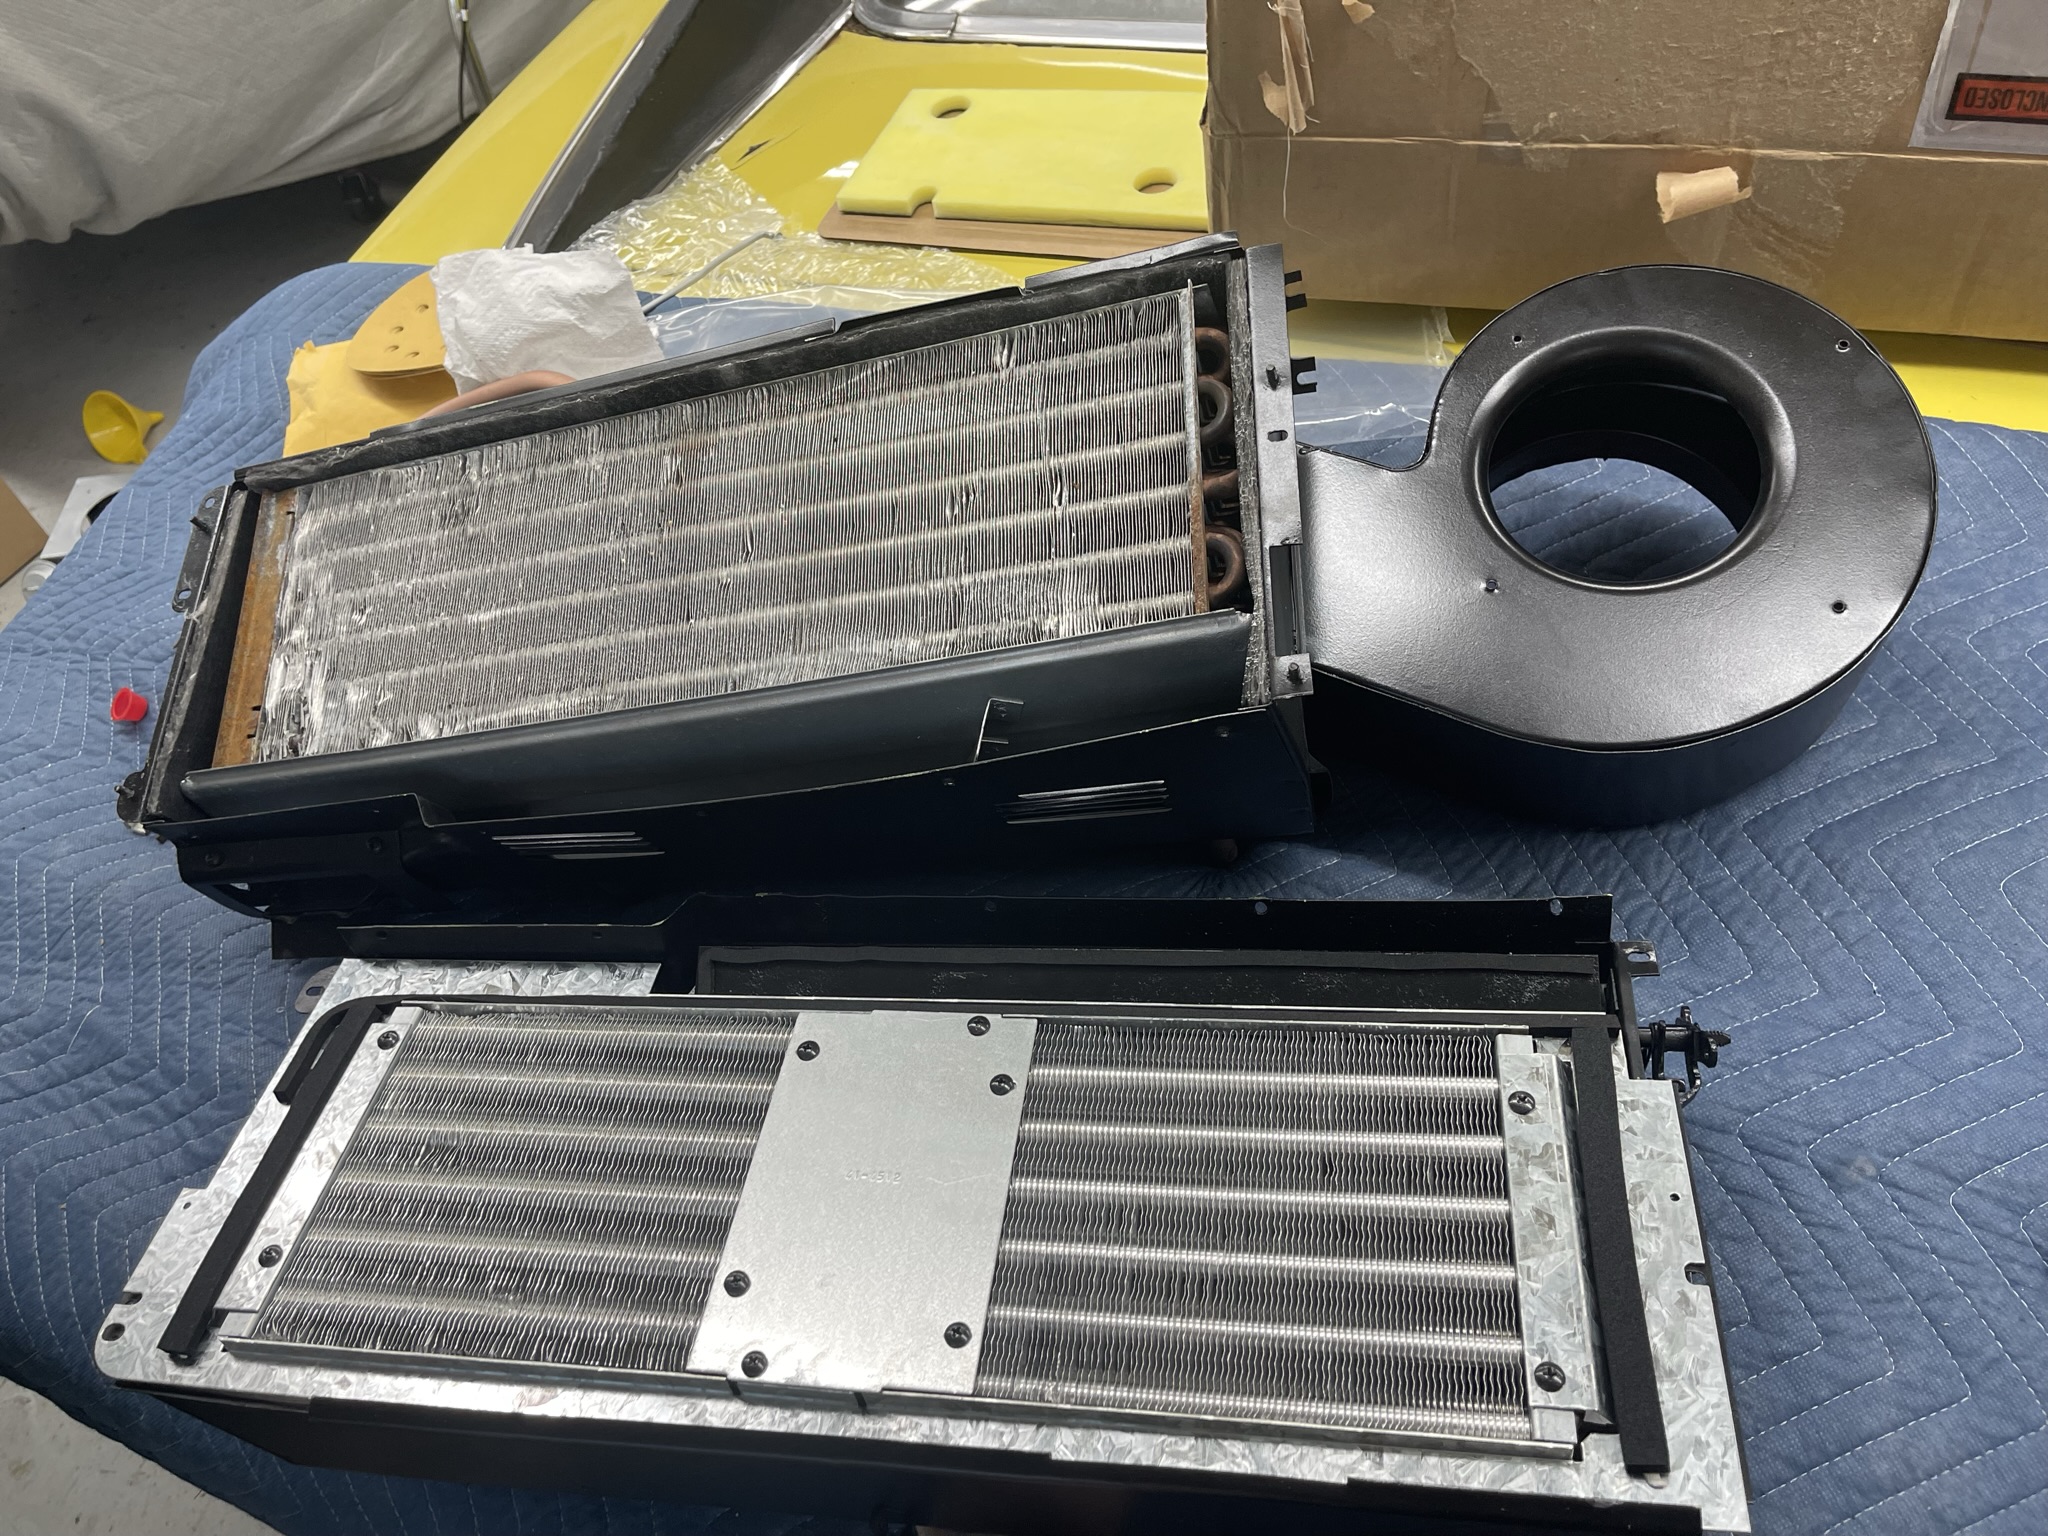
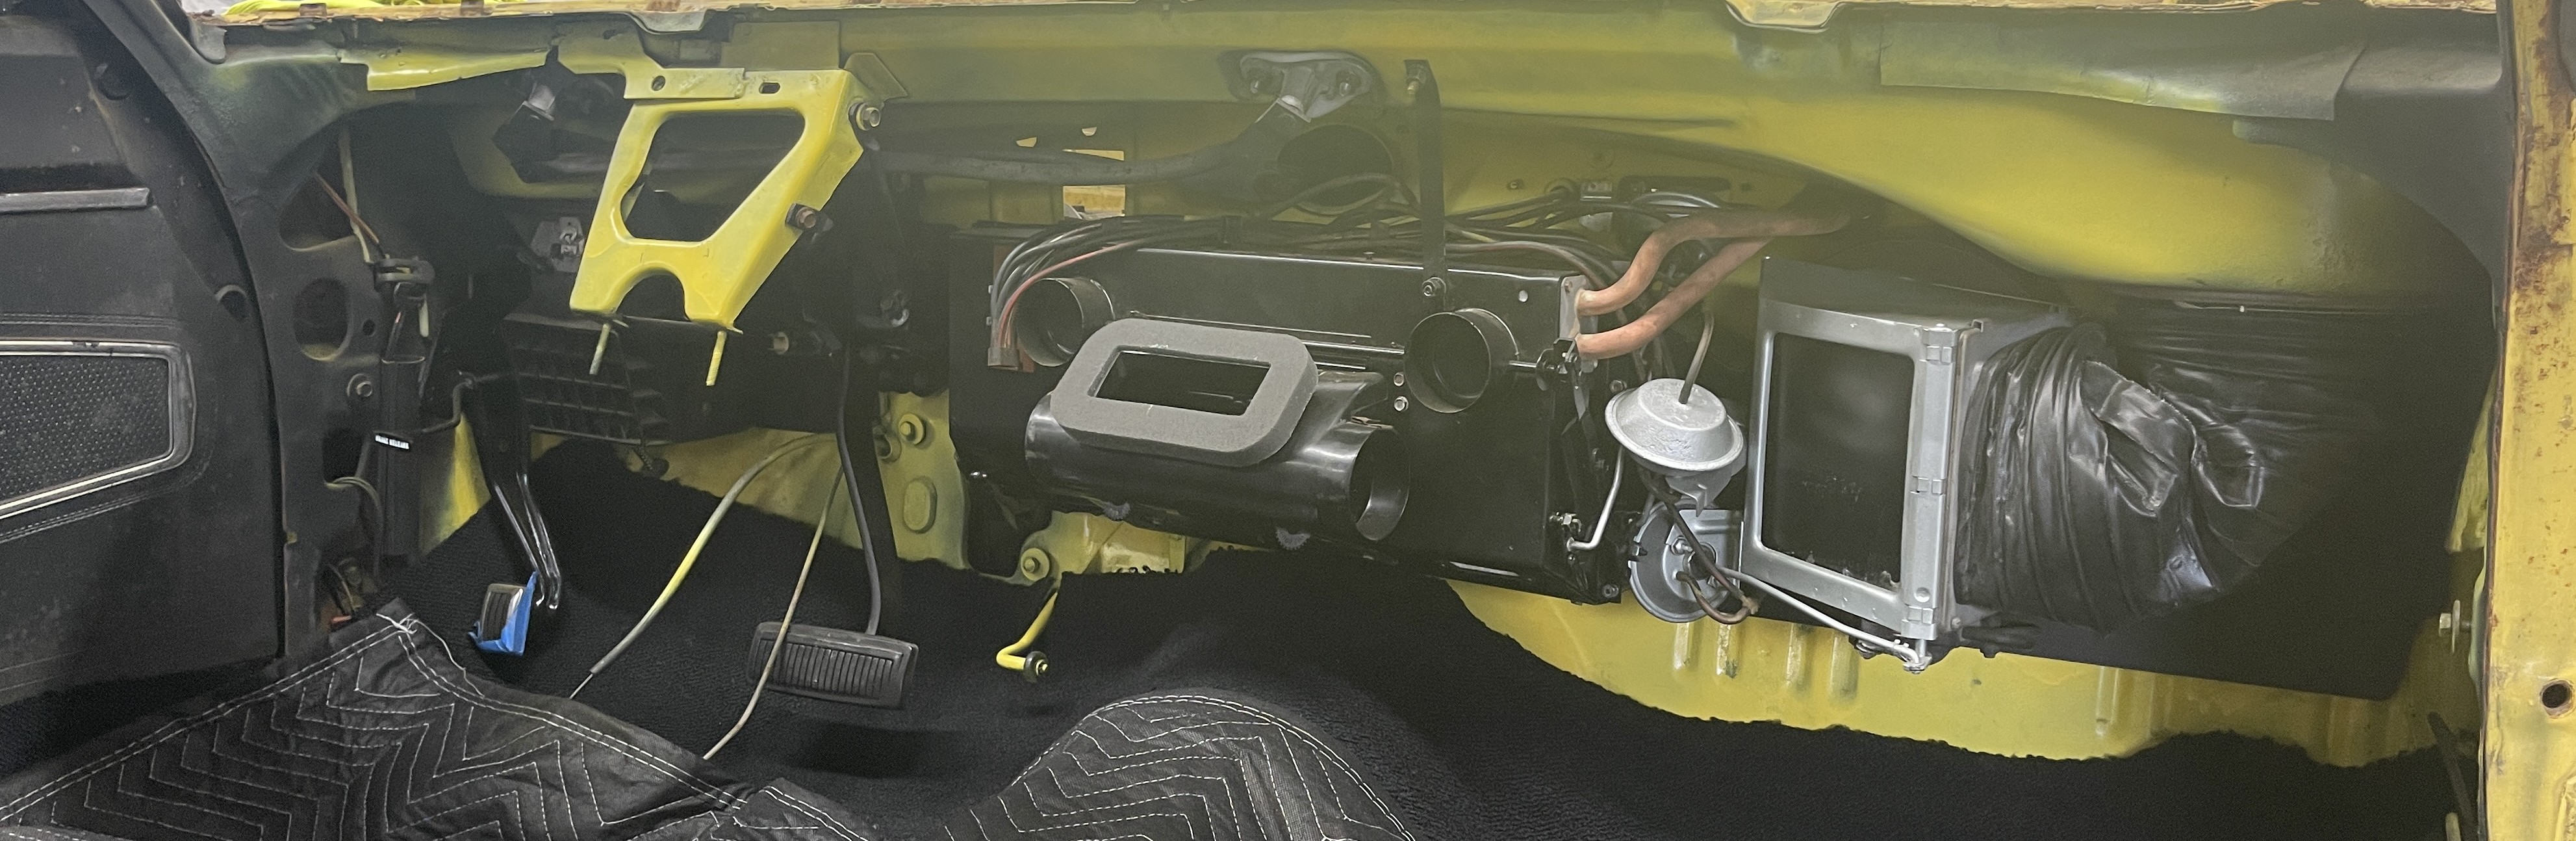
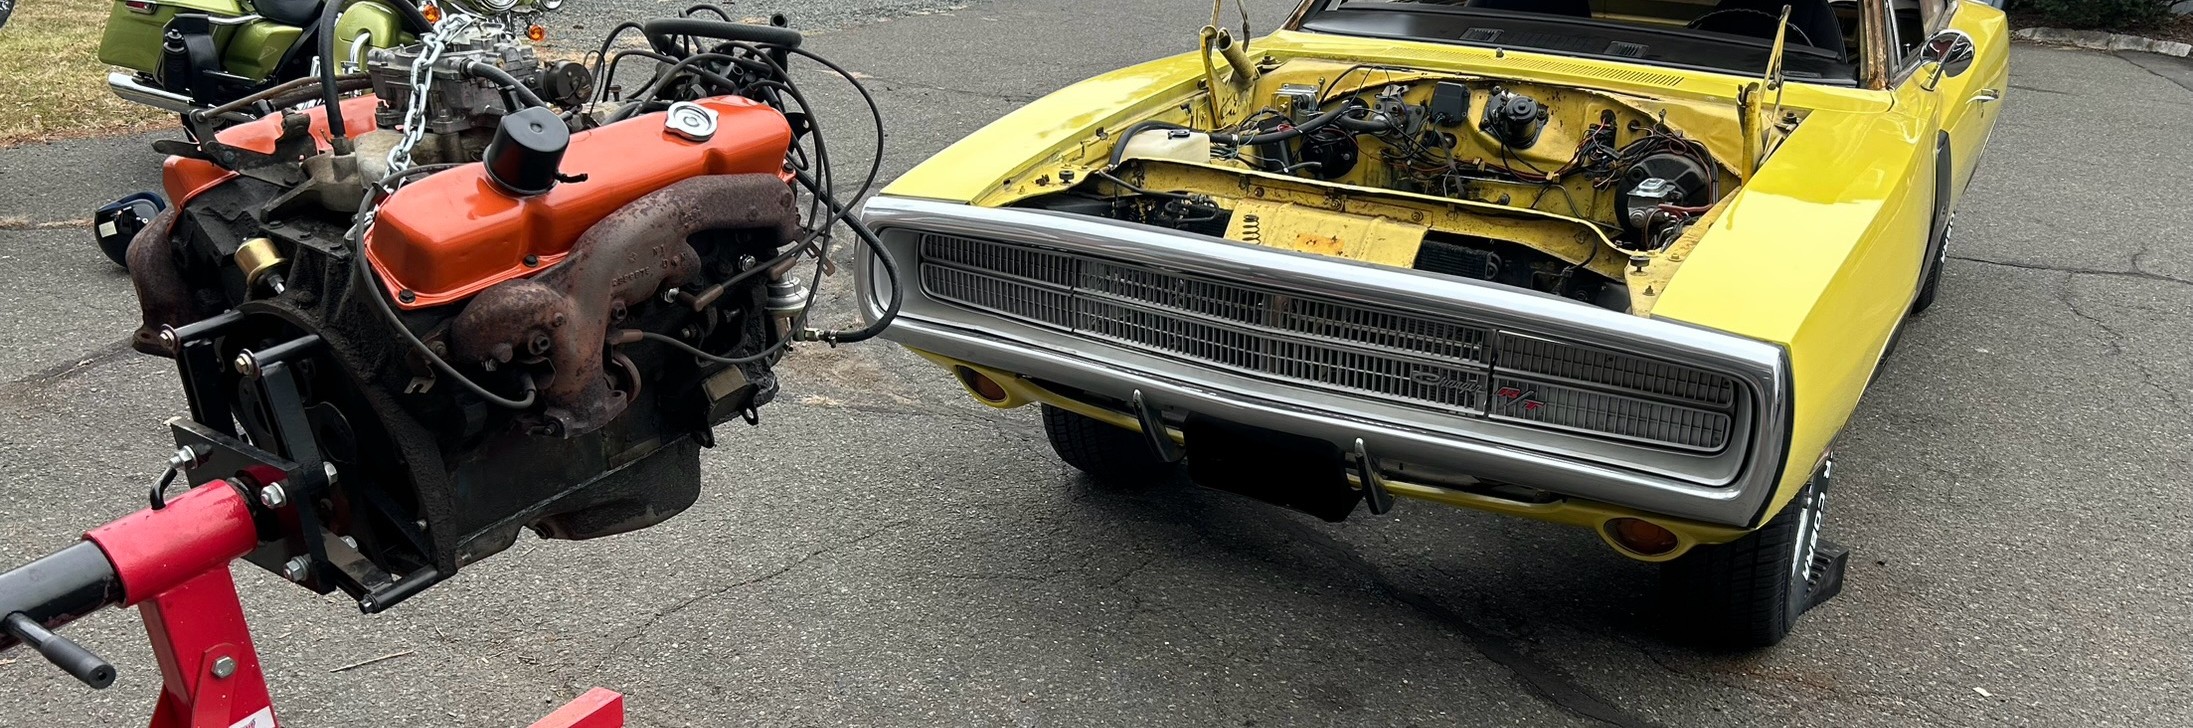
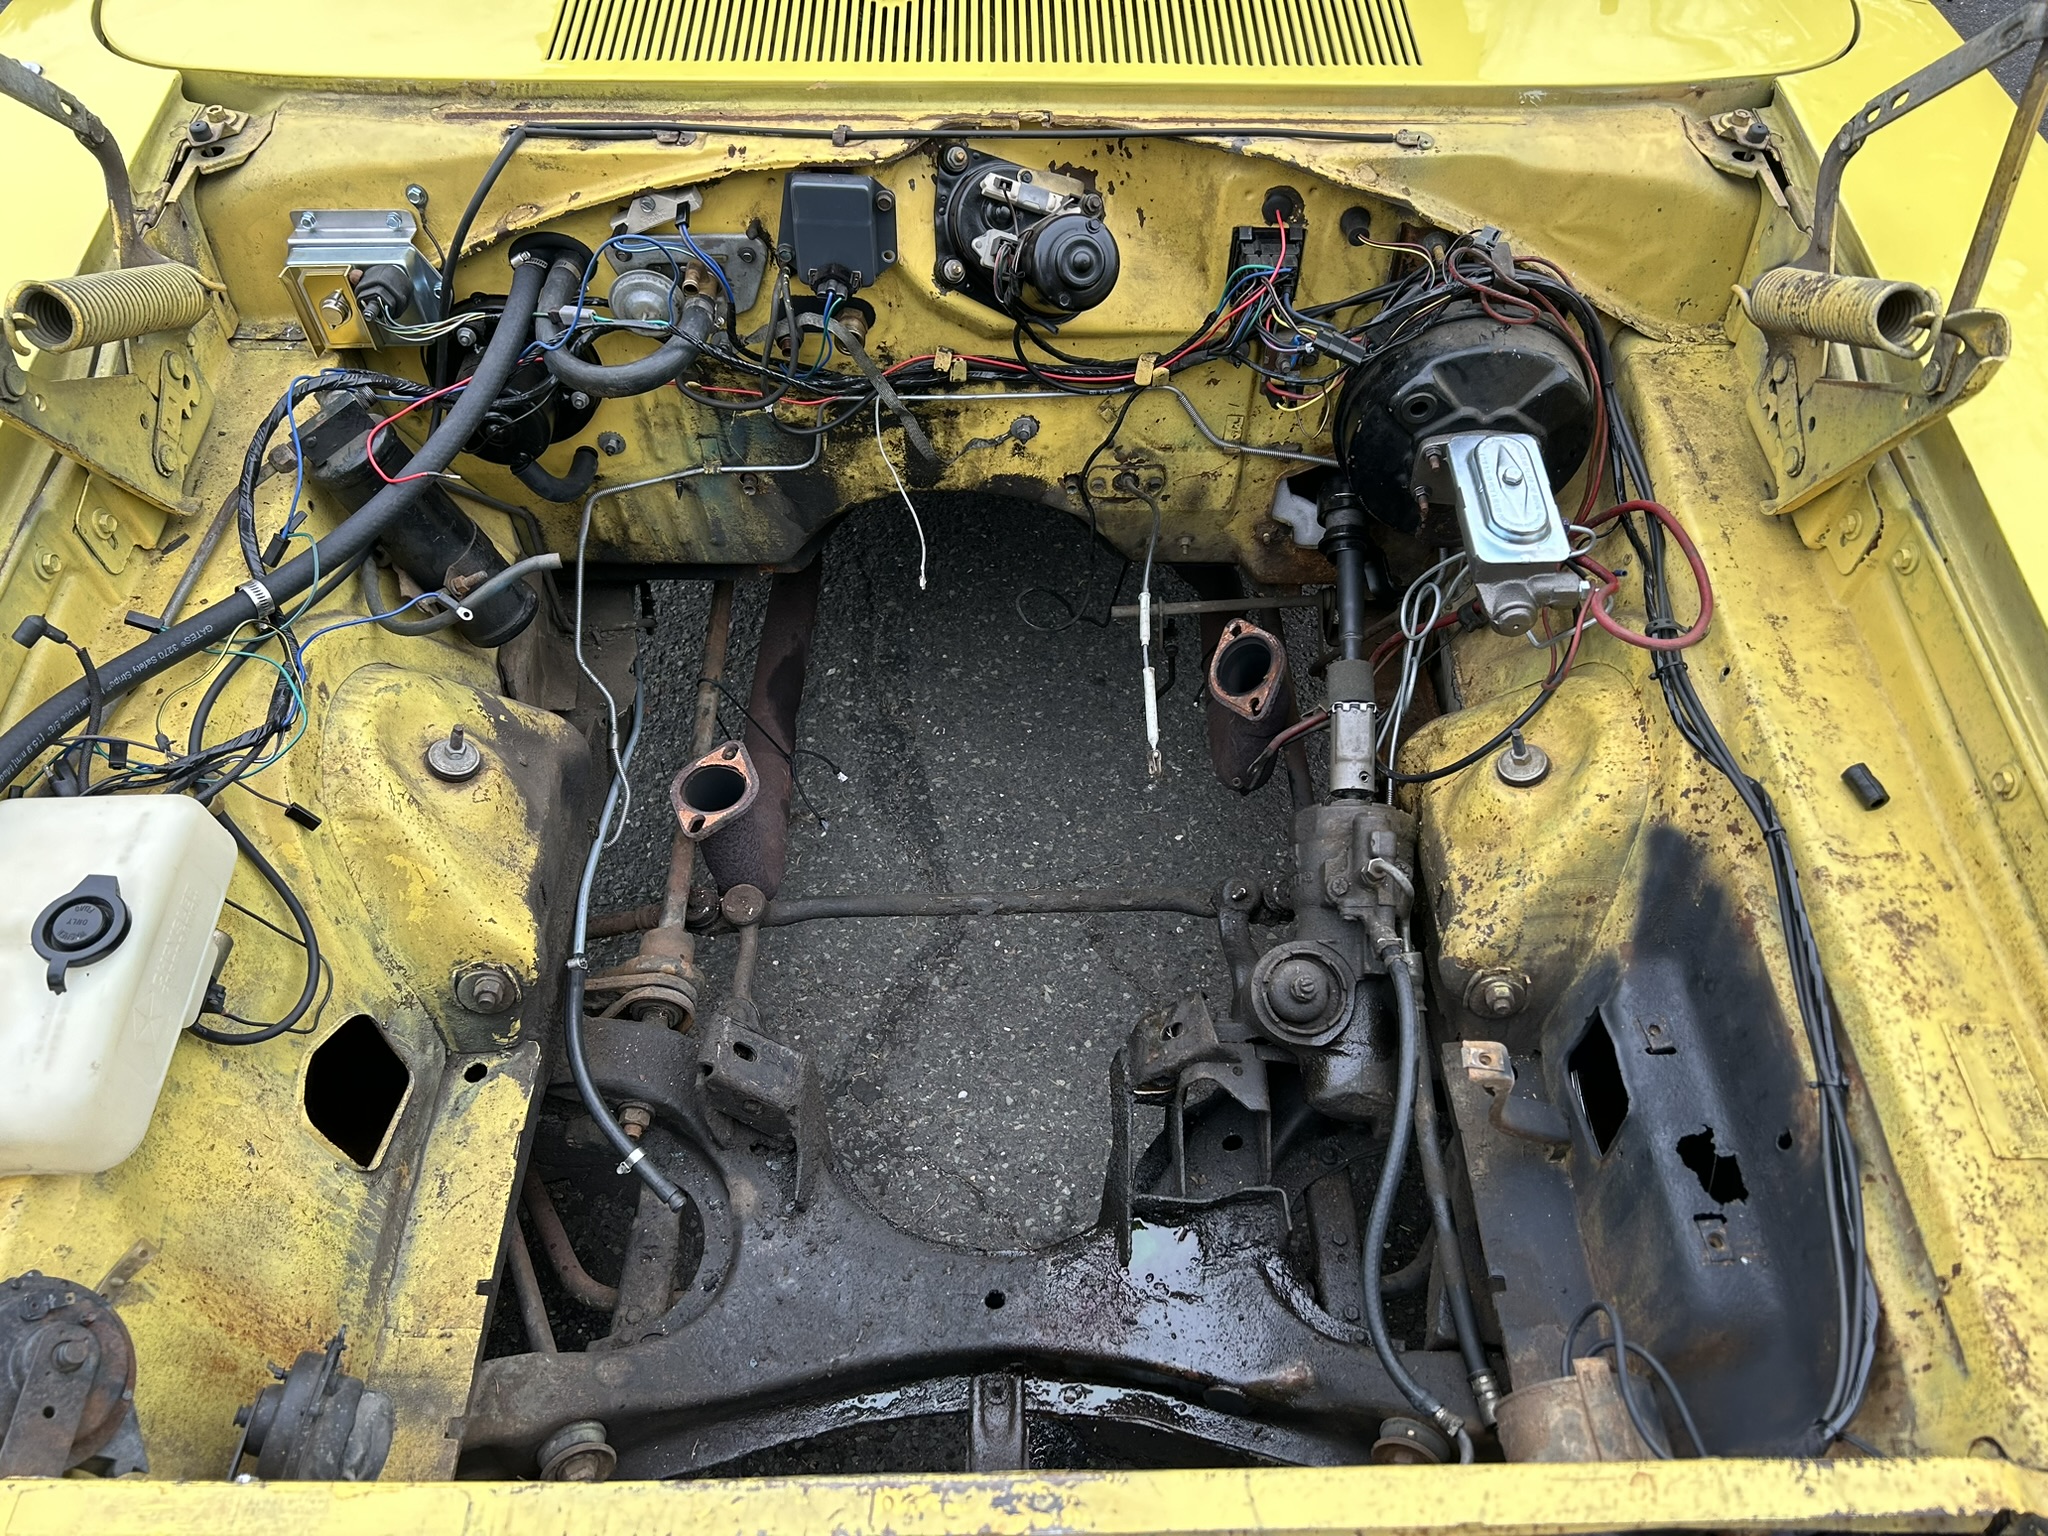
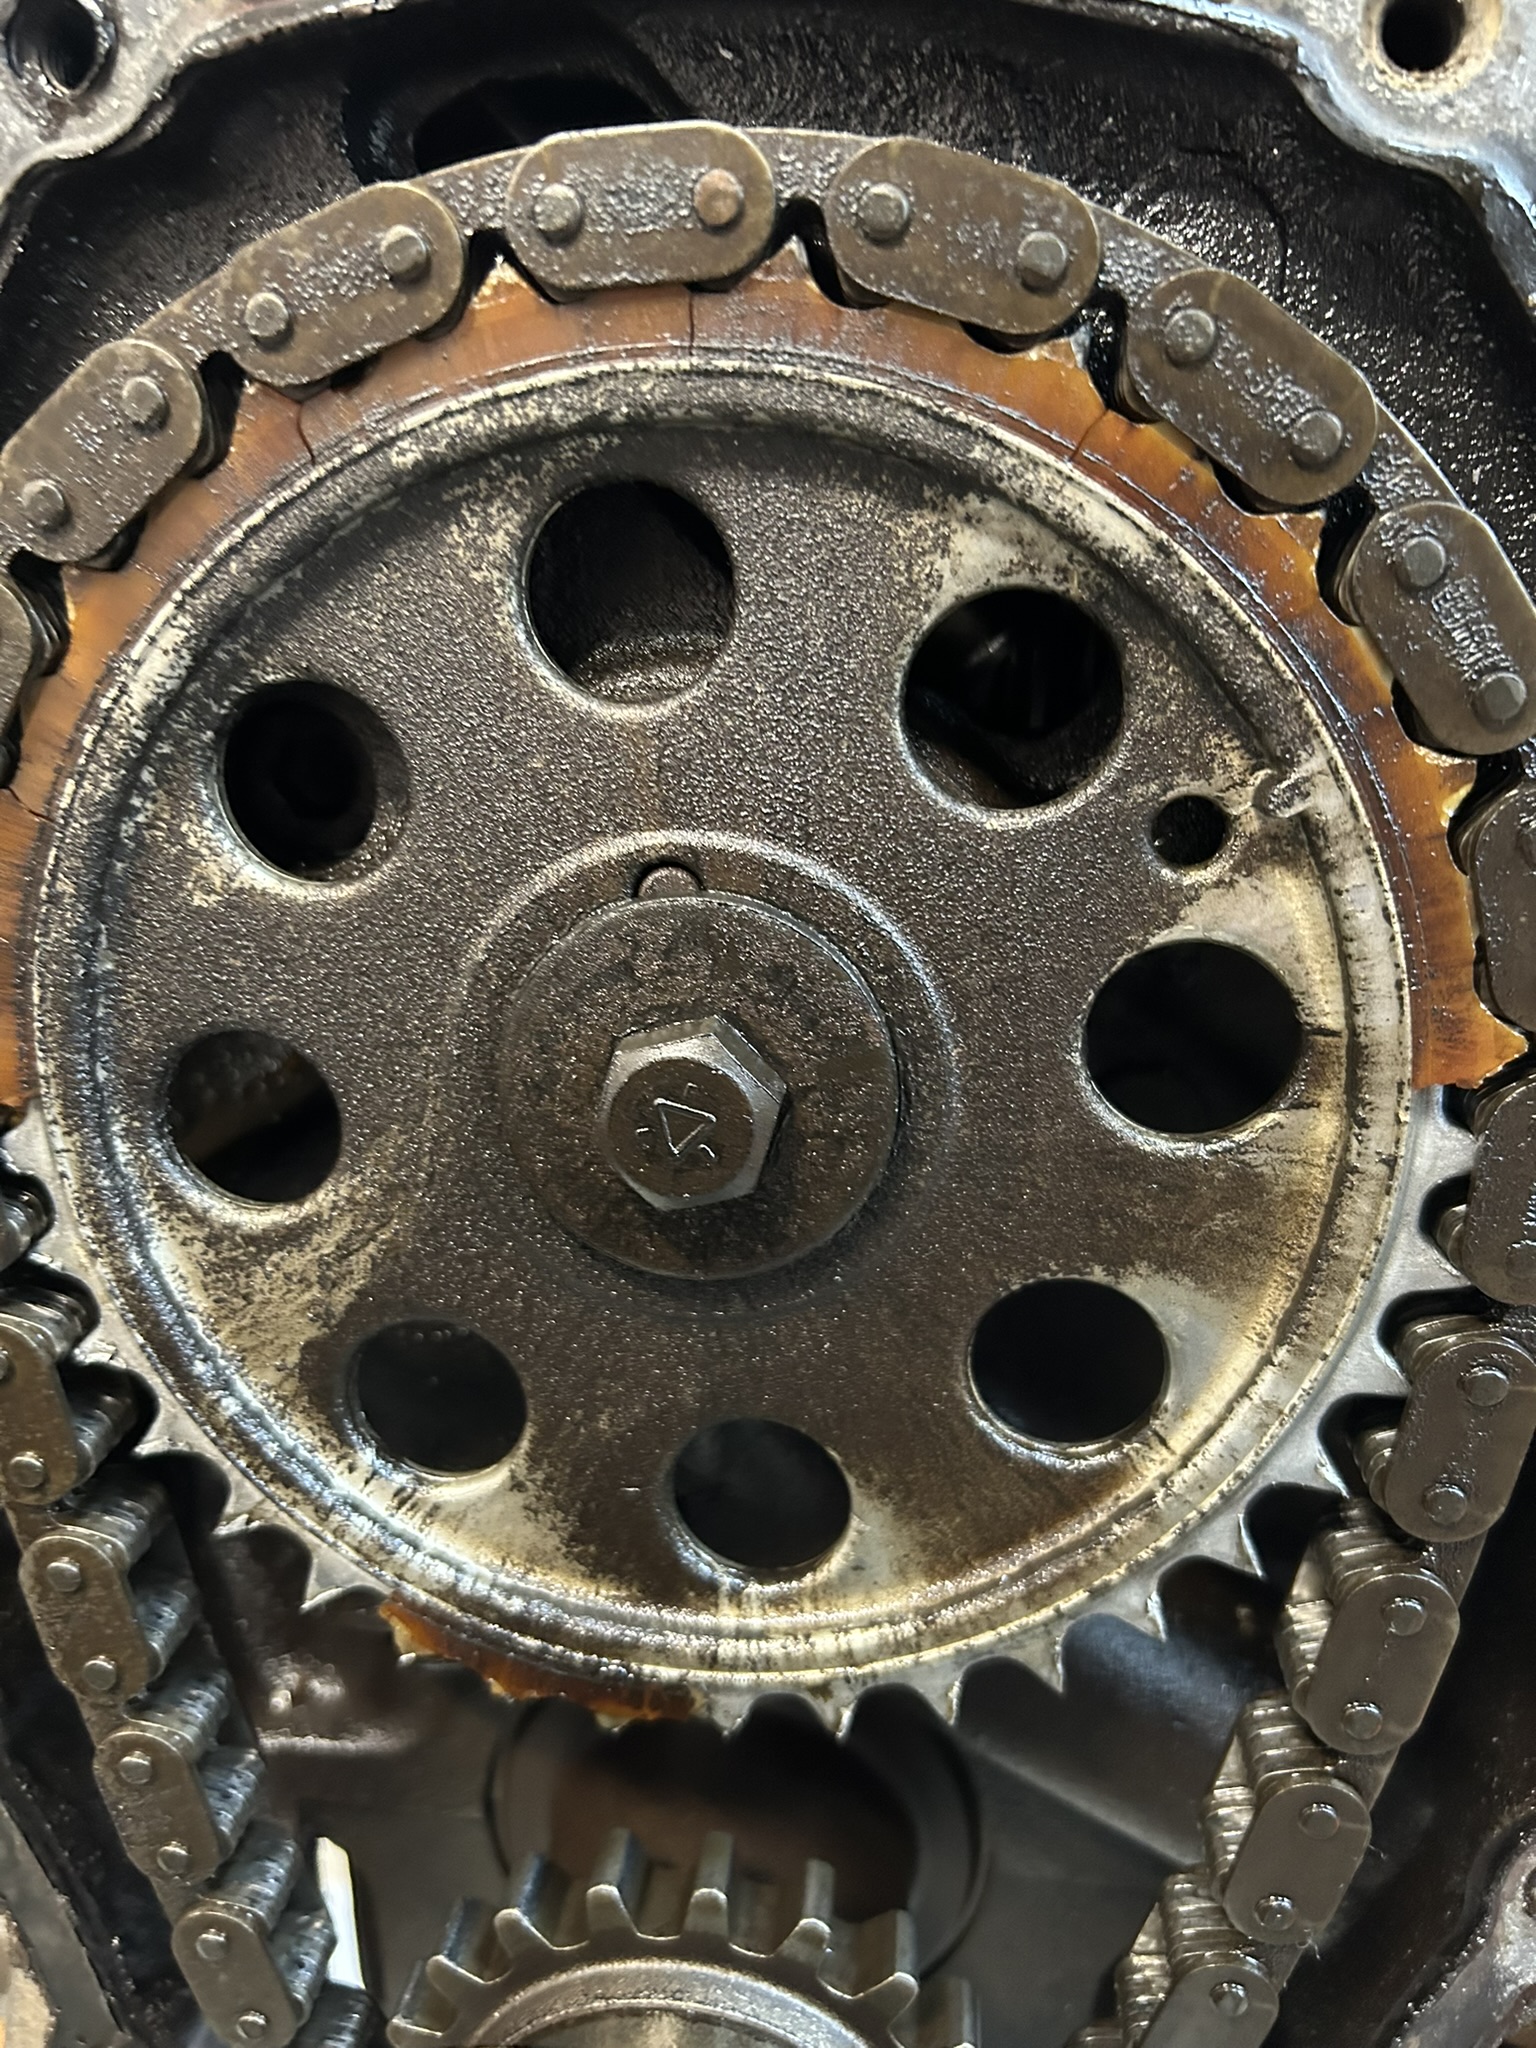
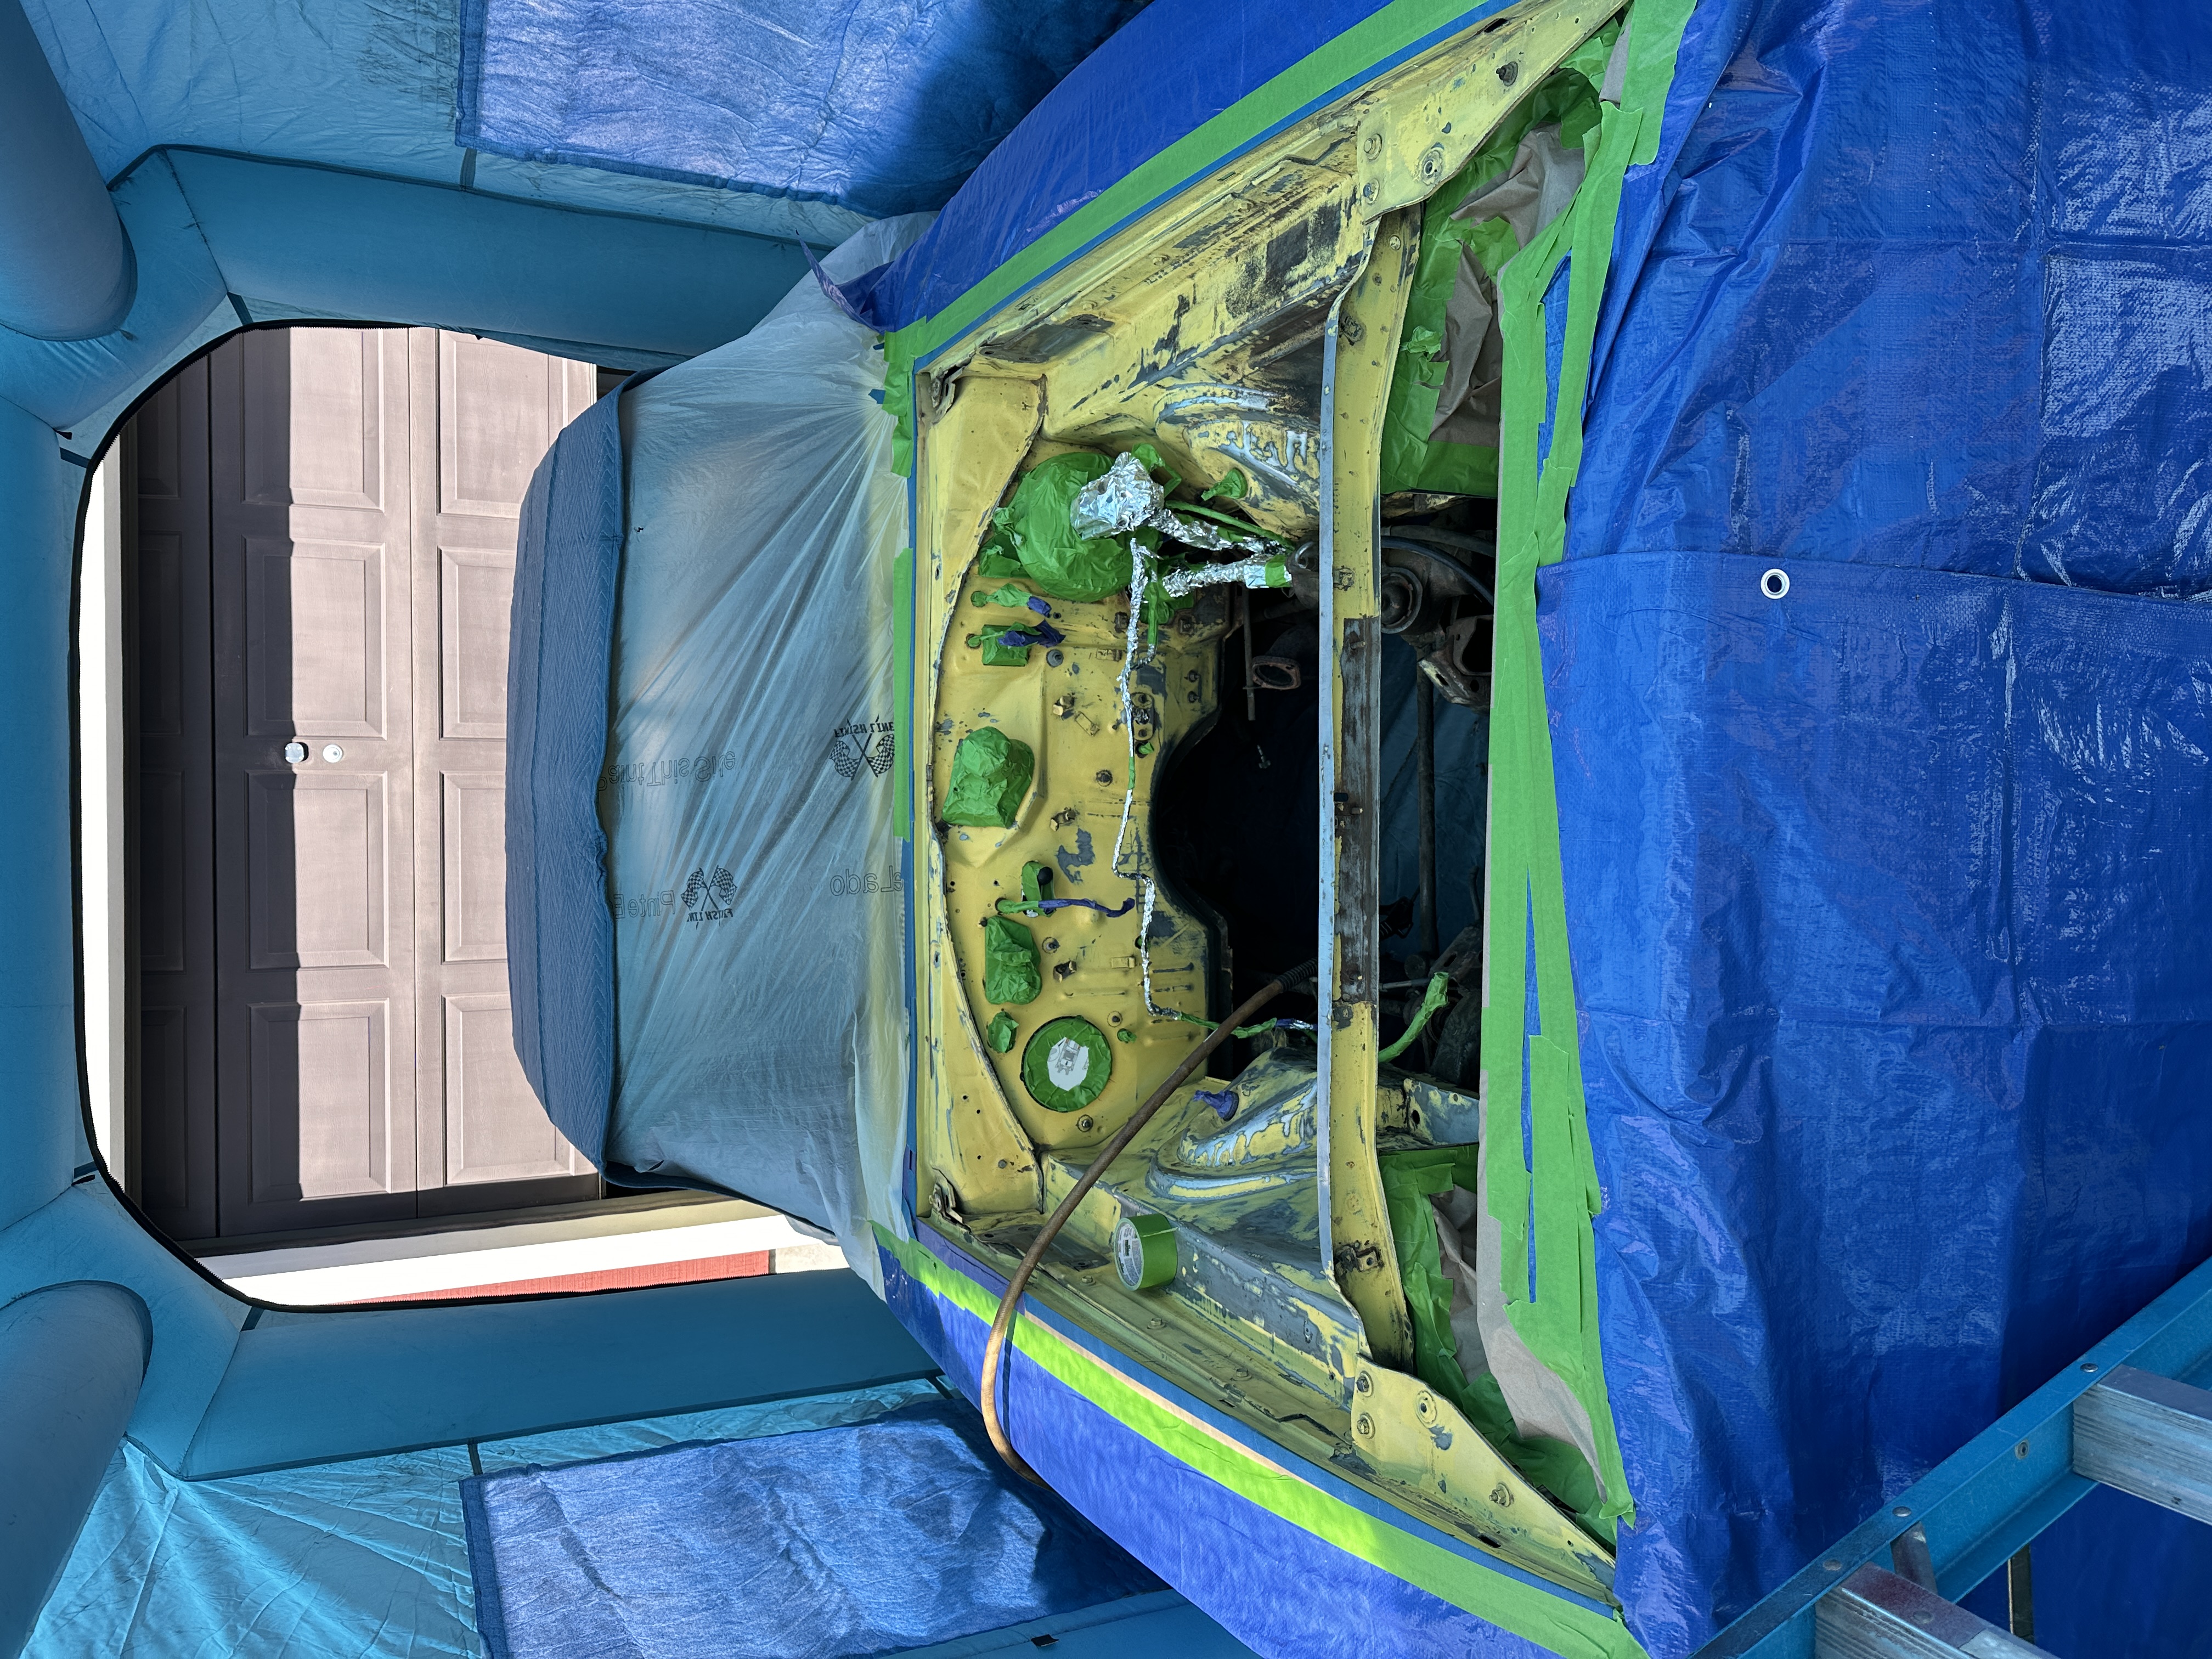
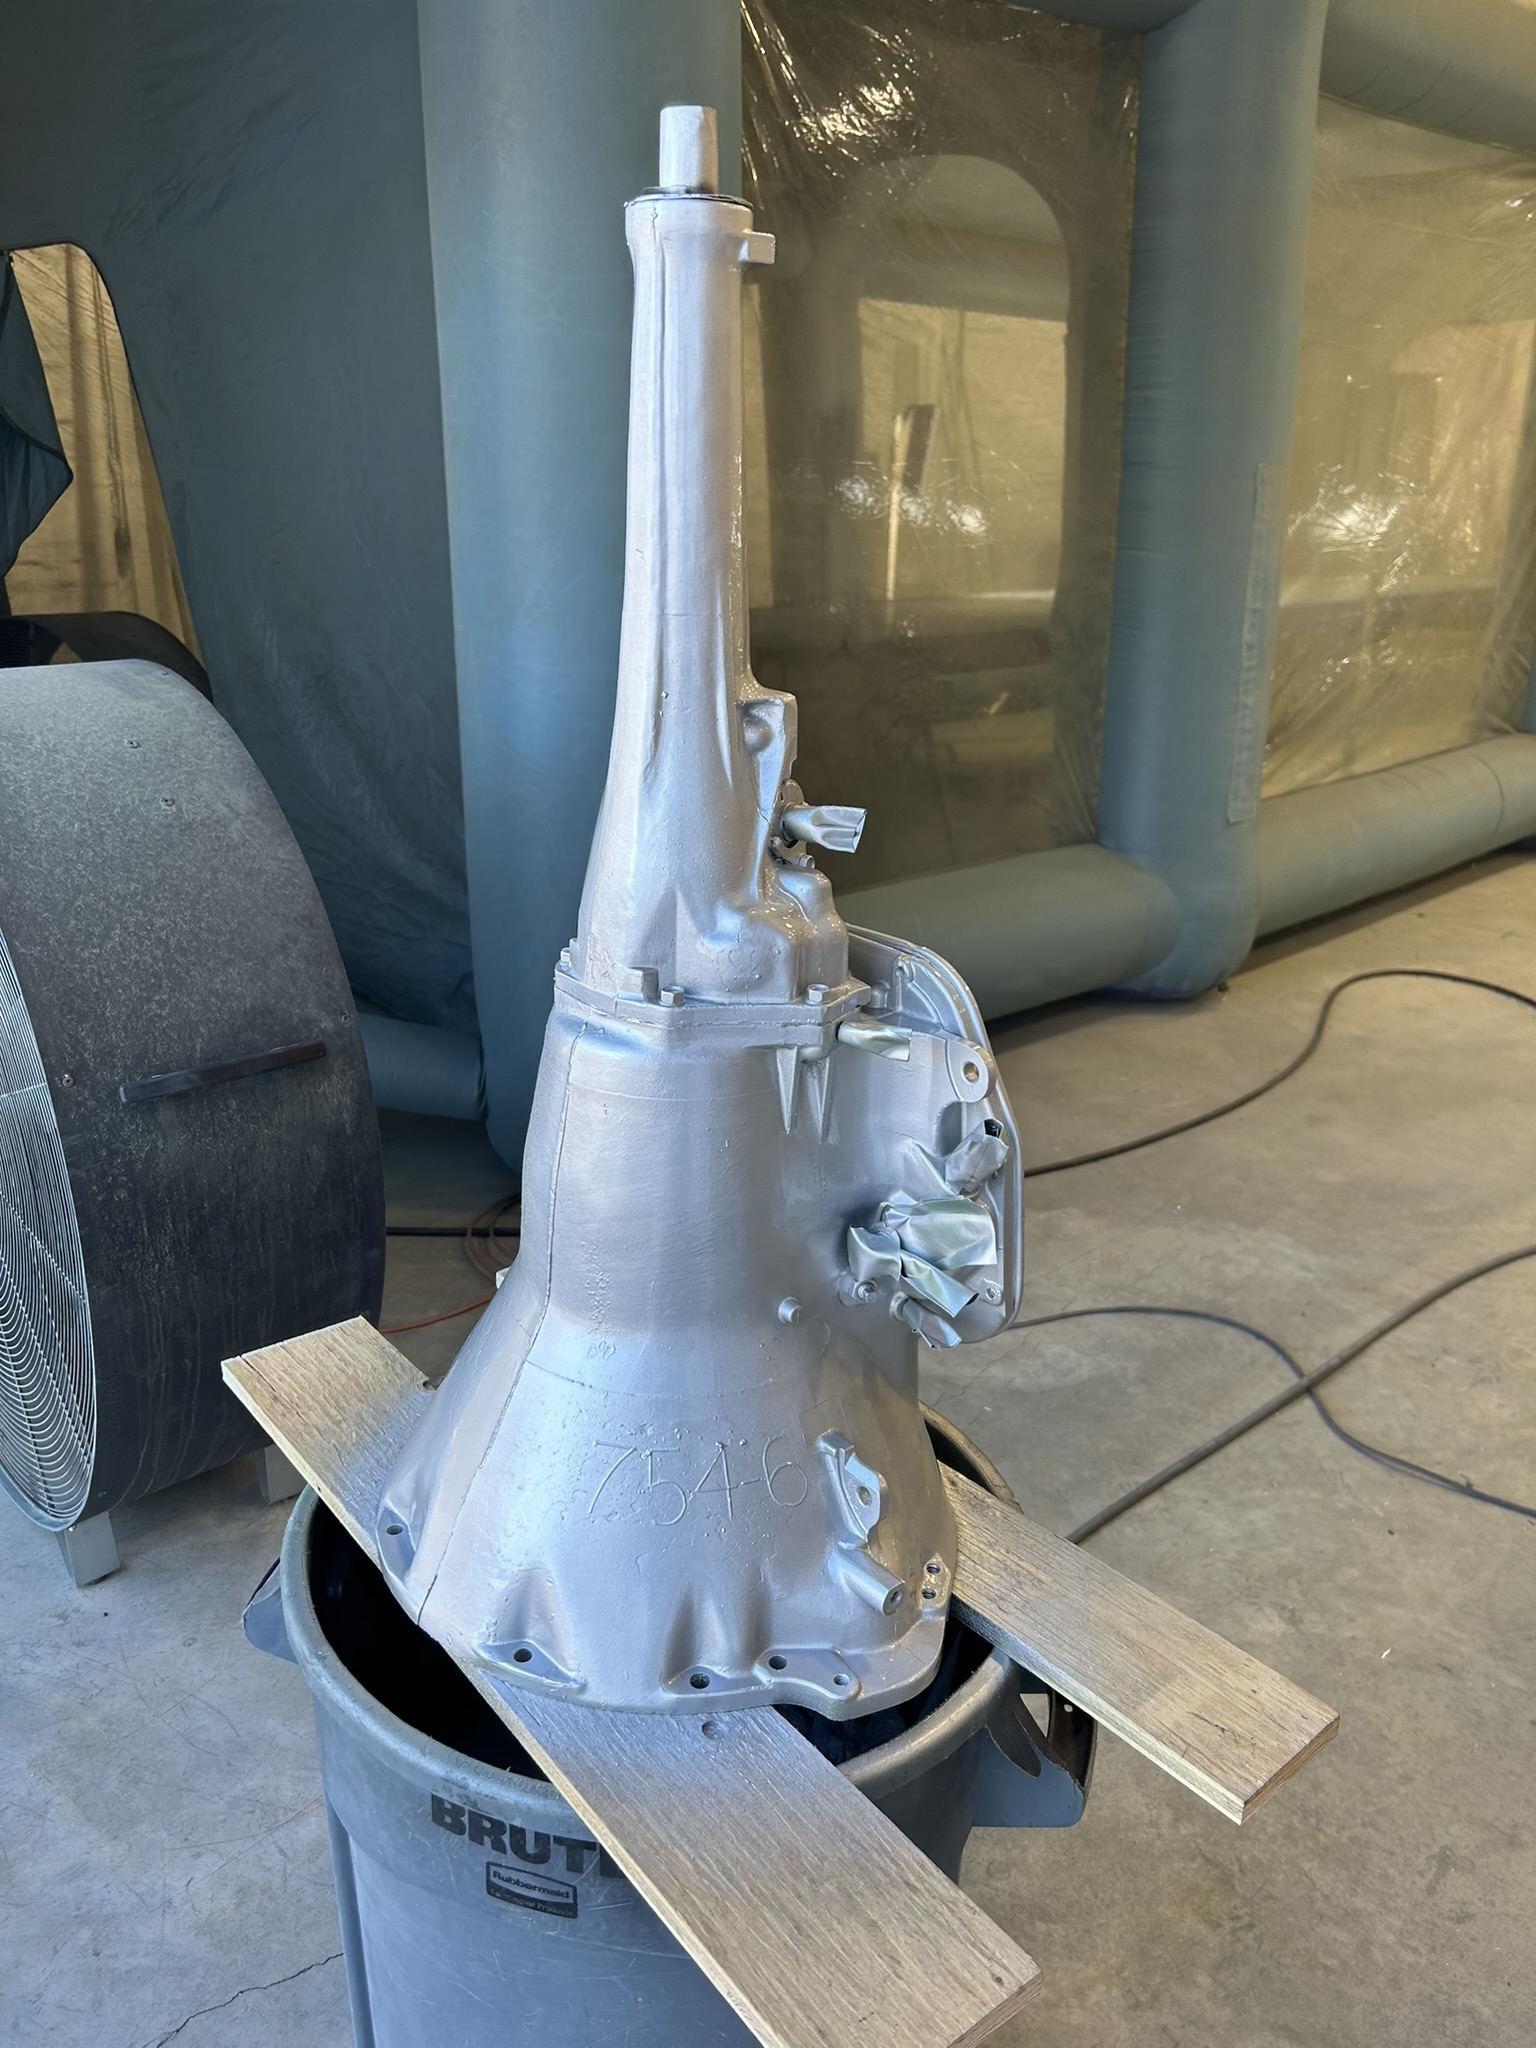
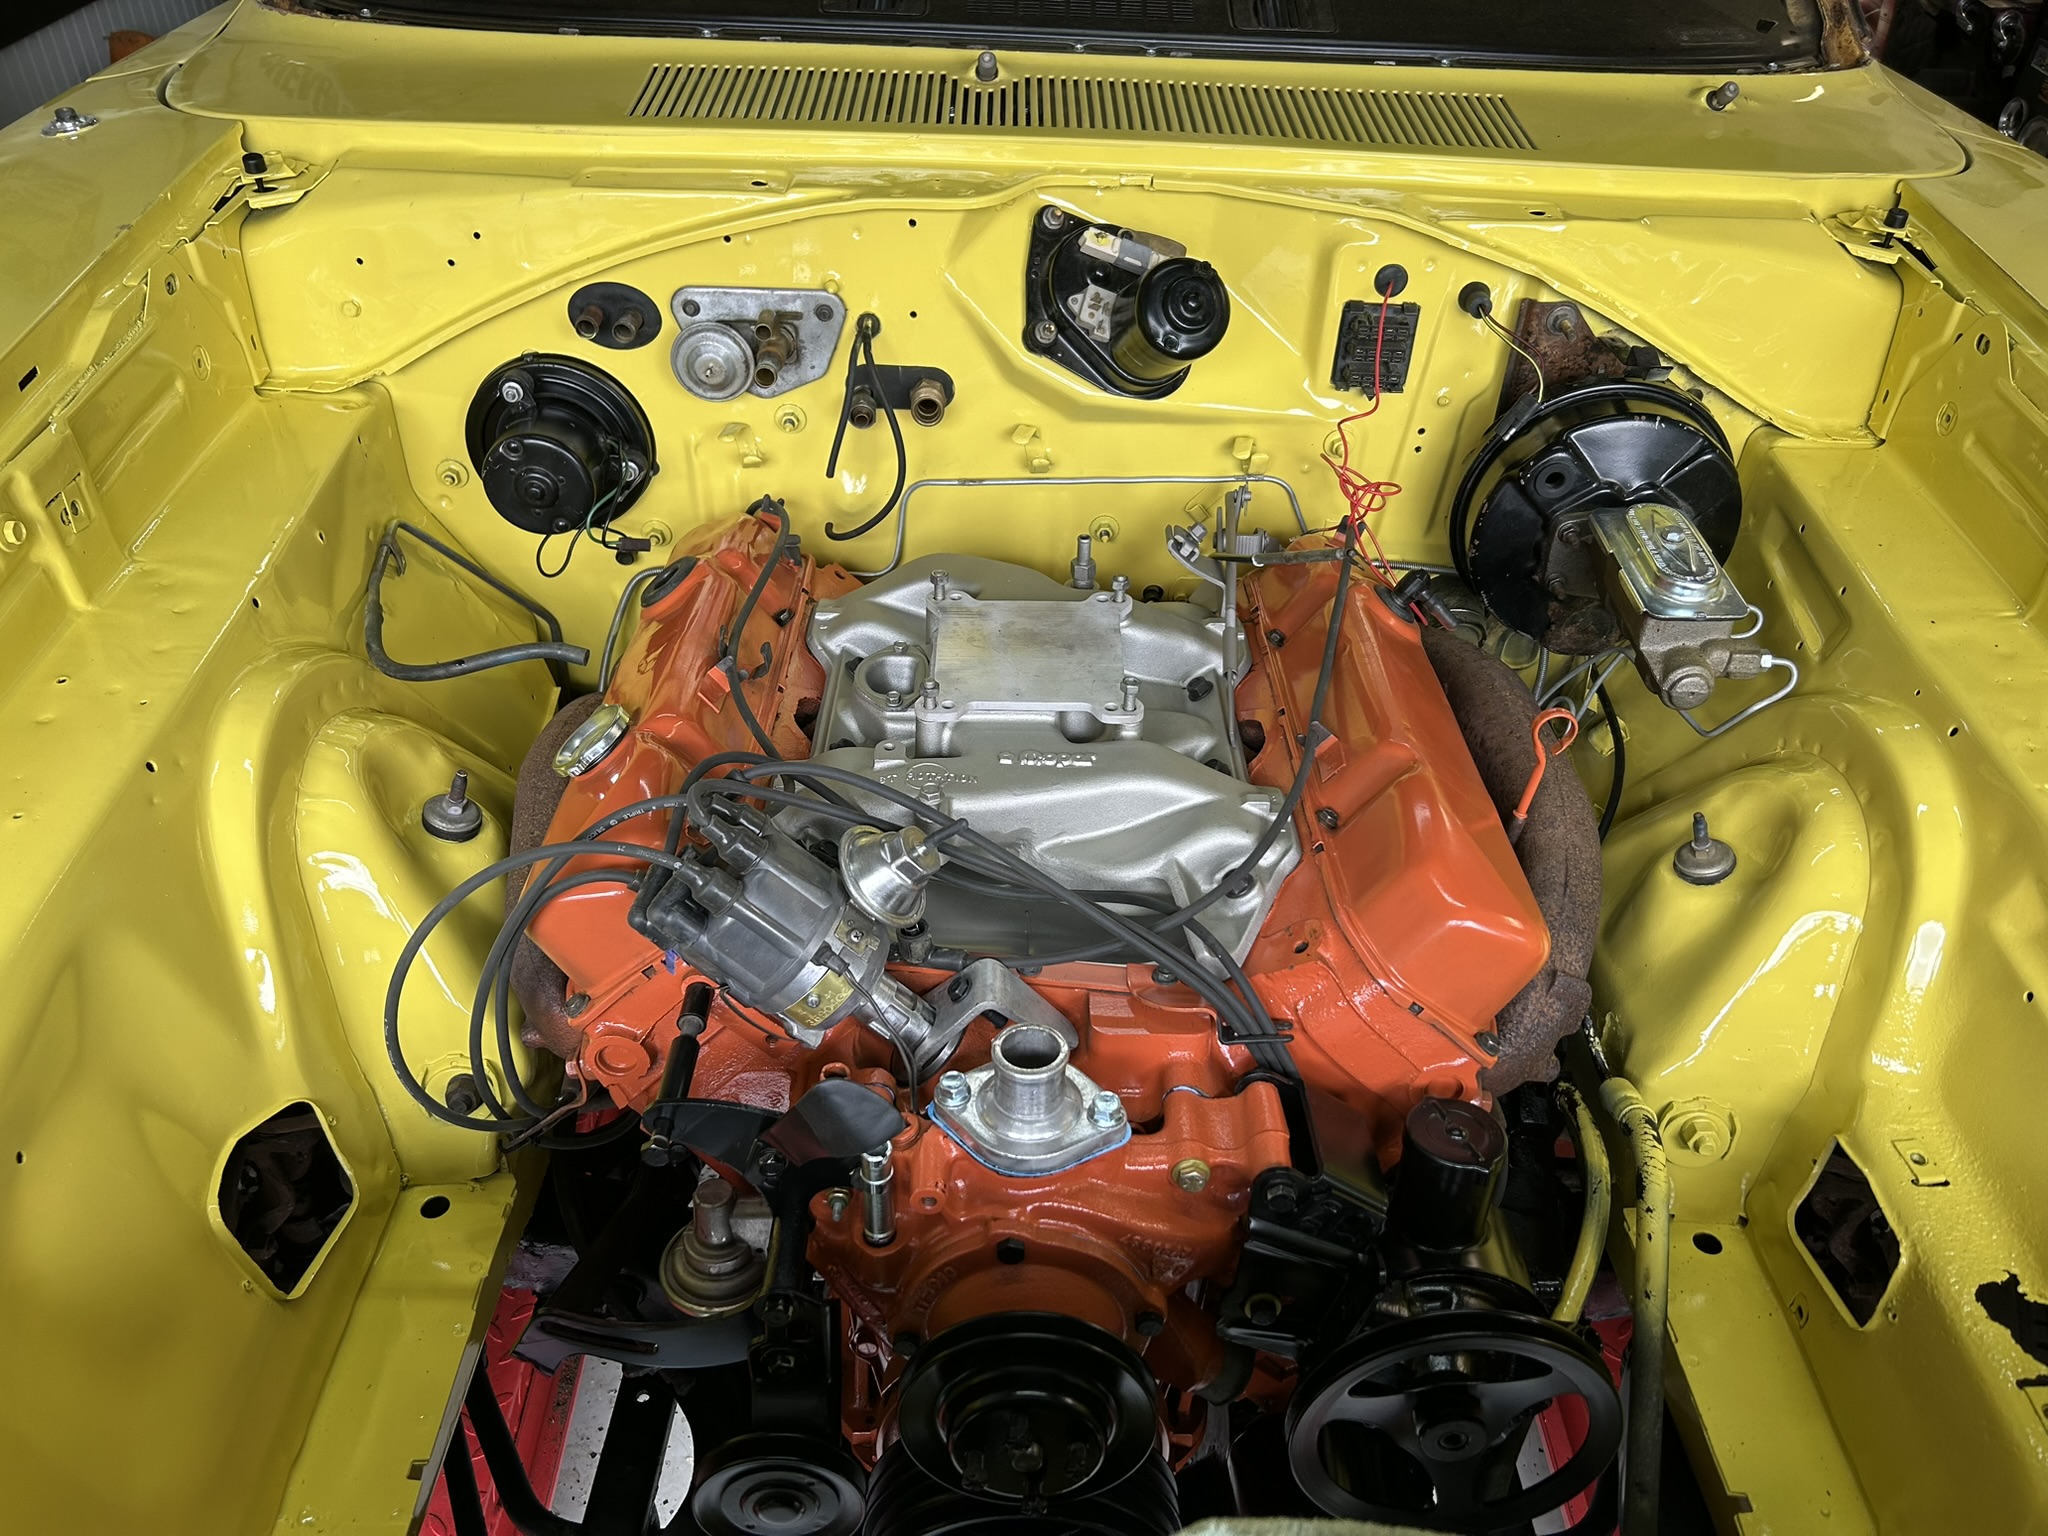
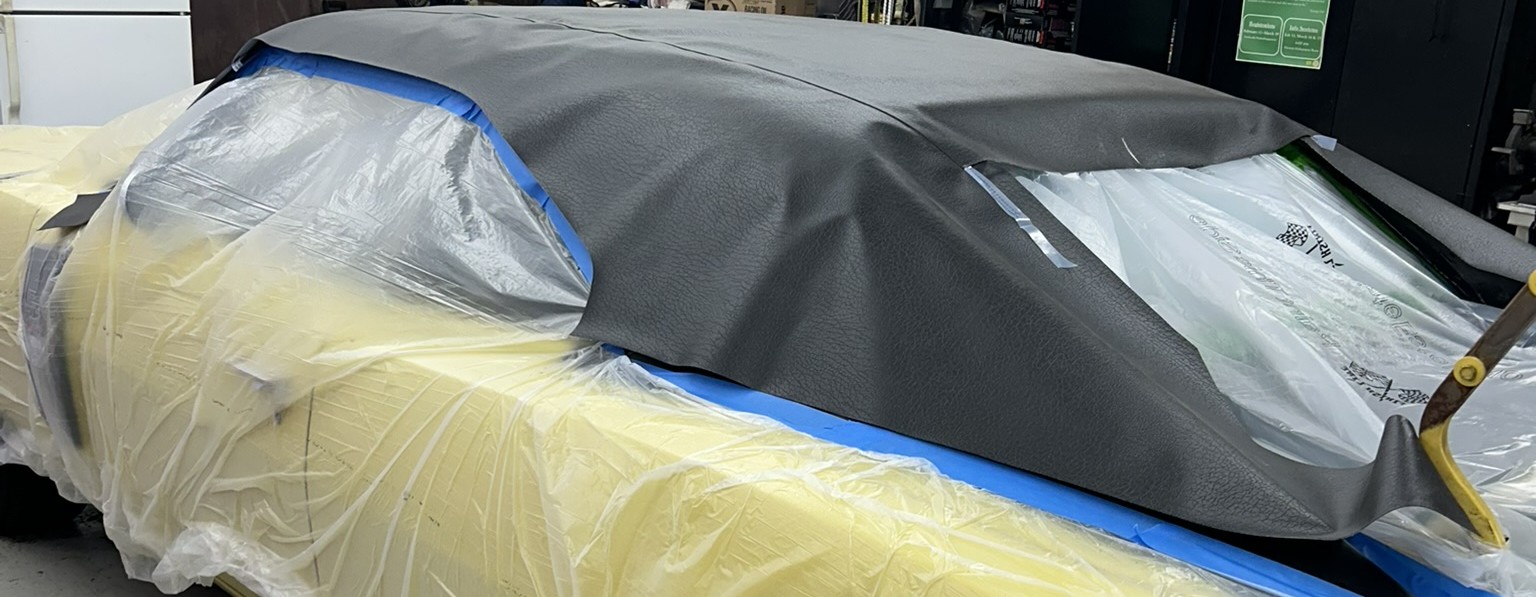
1970 Dodge Charger Restoration. After 15 years sitting on cinder-blocks, I began by disassembling the dashboard and ripping out all the corroded old wiring. Blowy the heater core was rebuilt with renewed and pressure tested evaporator and condenser as these are crucial points to make sure no leaks occurred. Then the correct vents and blower motor transitions were connected. The dashboard was replaced with a brand new wiring harness and all new relays and lights. Anything that was broken was repaired to working order including all the gauges and even the clock. In the meantime waiting for dashboard parts , the engine was taken out. It received a full refresh alongside a full engine bay overhaul with color matched paint. The roof was rusted and pitted so after hundreds of hours sanding and remodeling the roof, a new vinyl top was put on. Many other things were replaced such as wheels, transmission, Rear End Differential and many more items..
Gallery

This car wouldbnt be built without the help and knowlegde from my Father alongside his numerous friends who always lent a helping hand when i needed it .
-
200+
Miles Driven so far.
-
50+
Head Turns and Thumbs Up
-
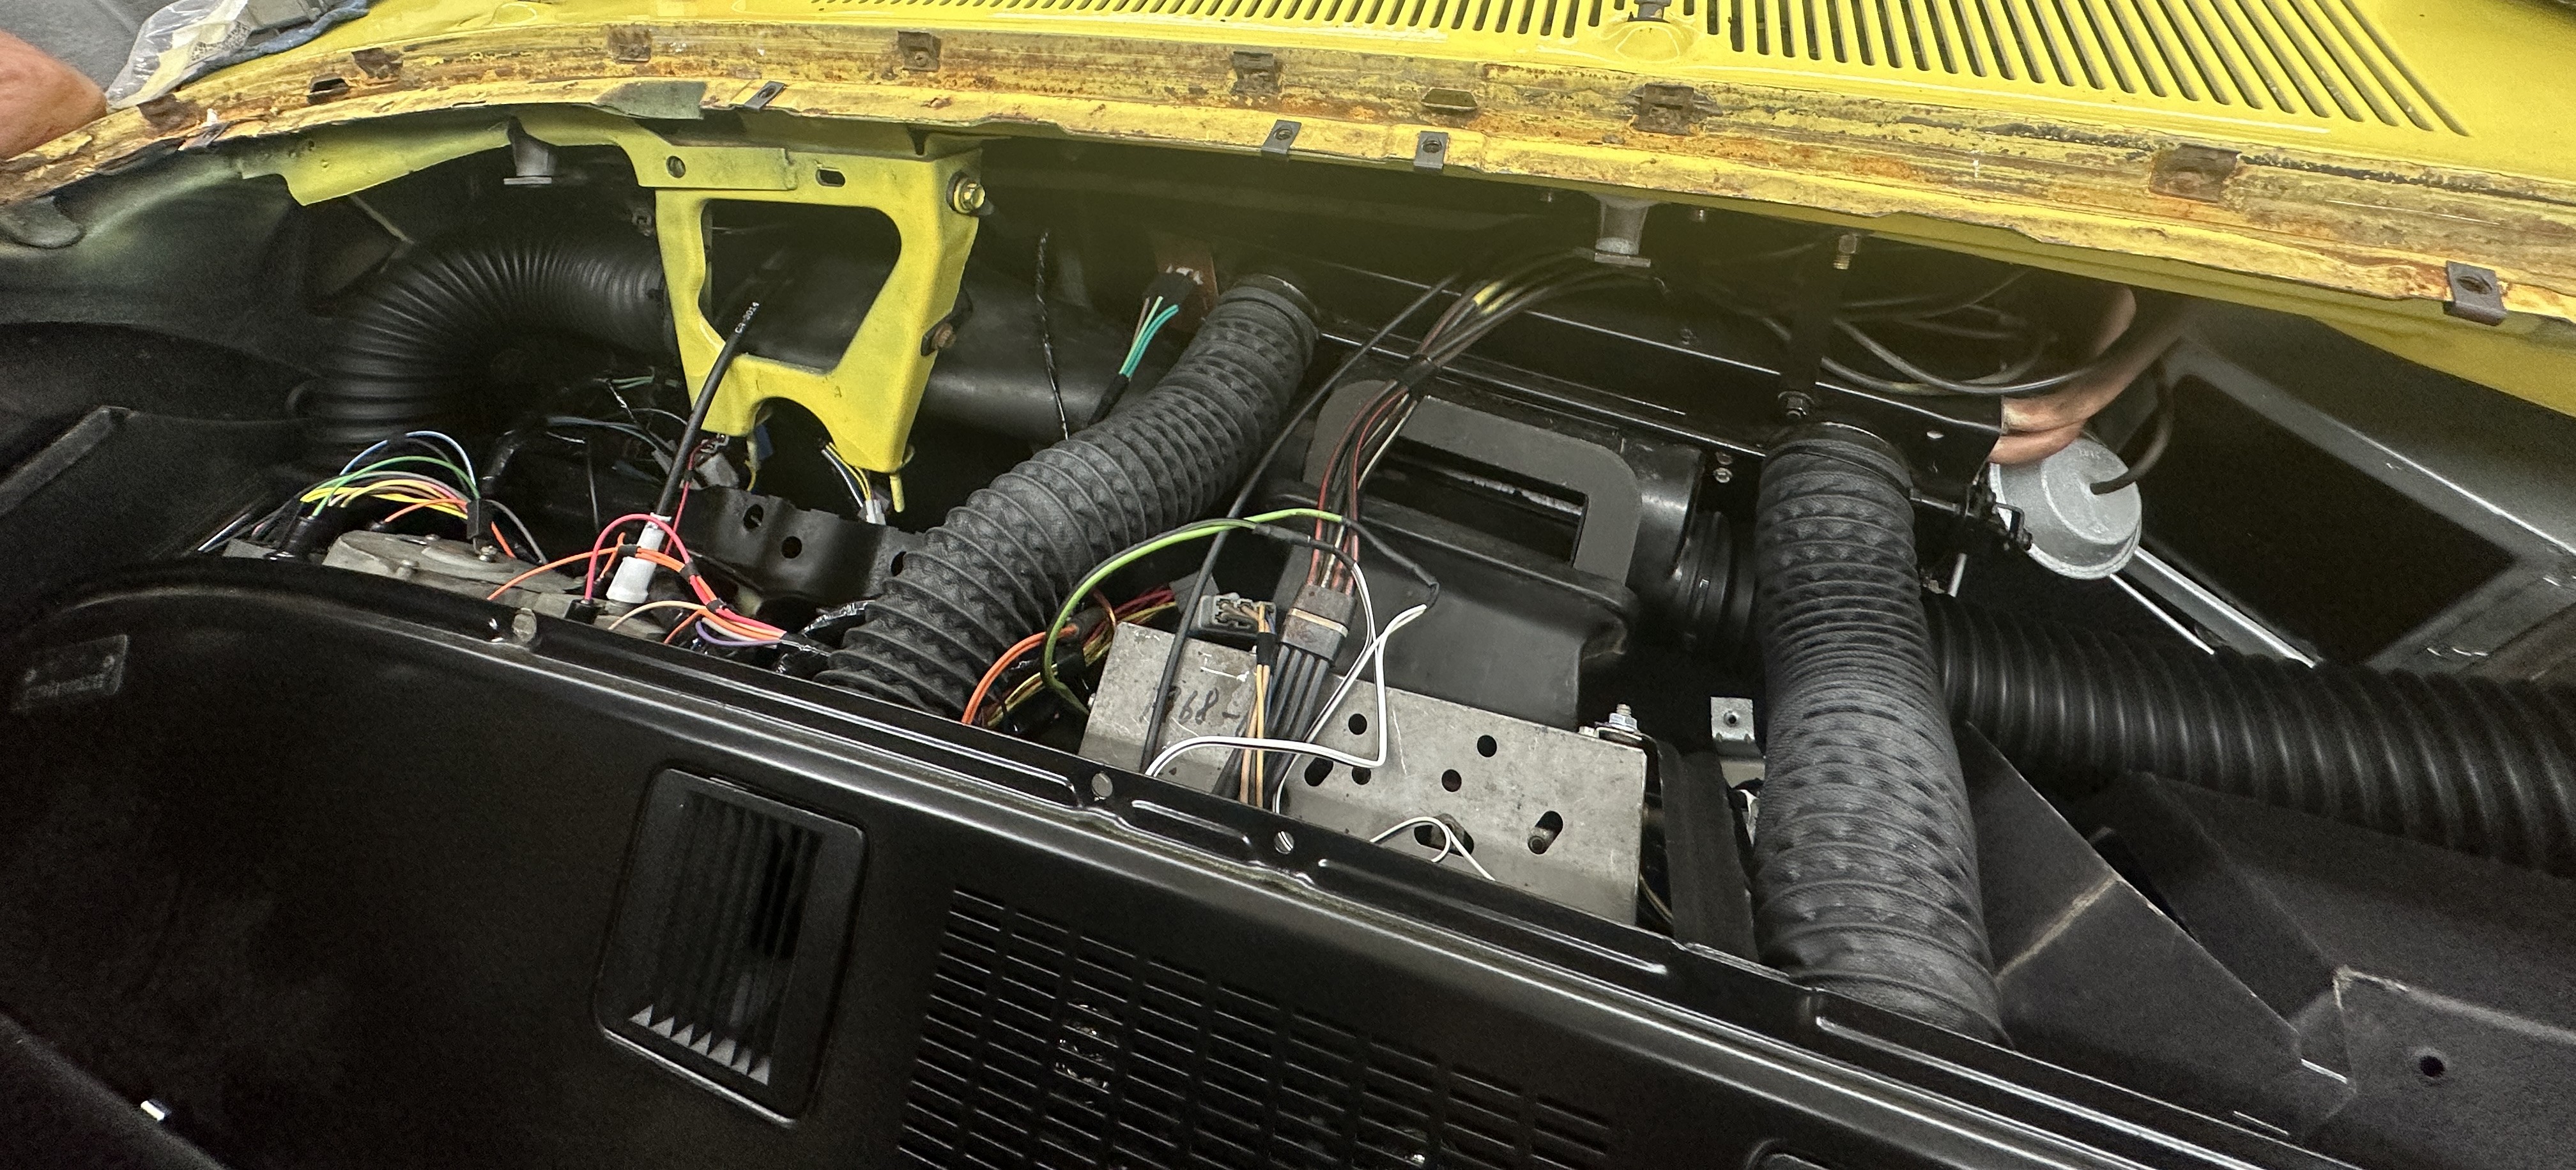
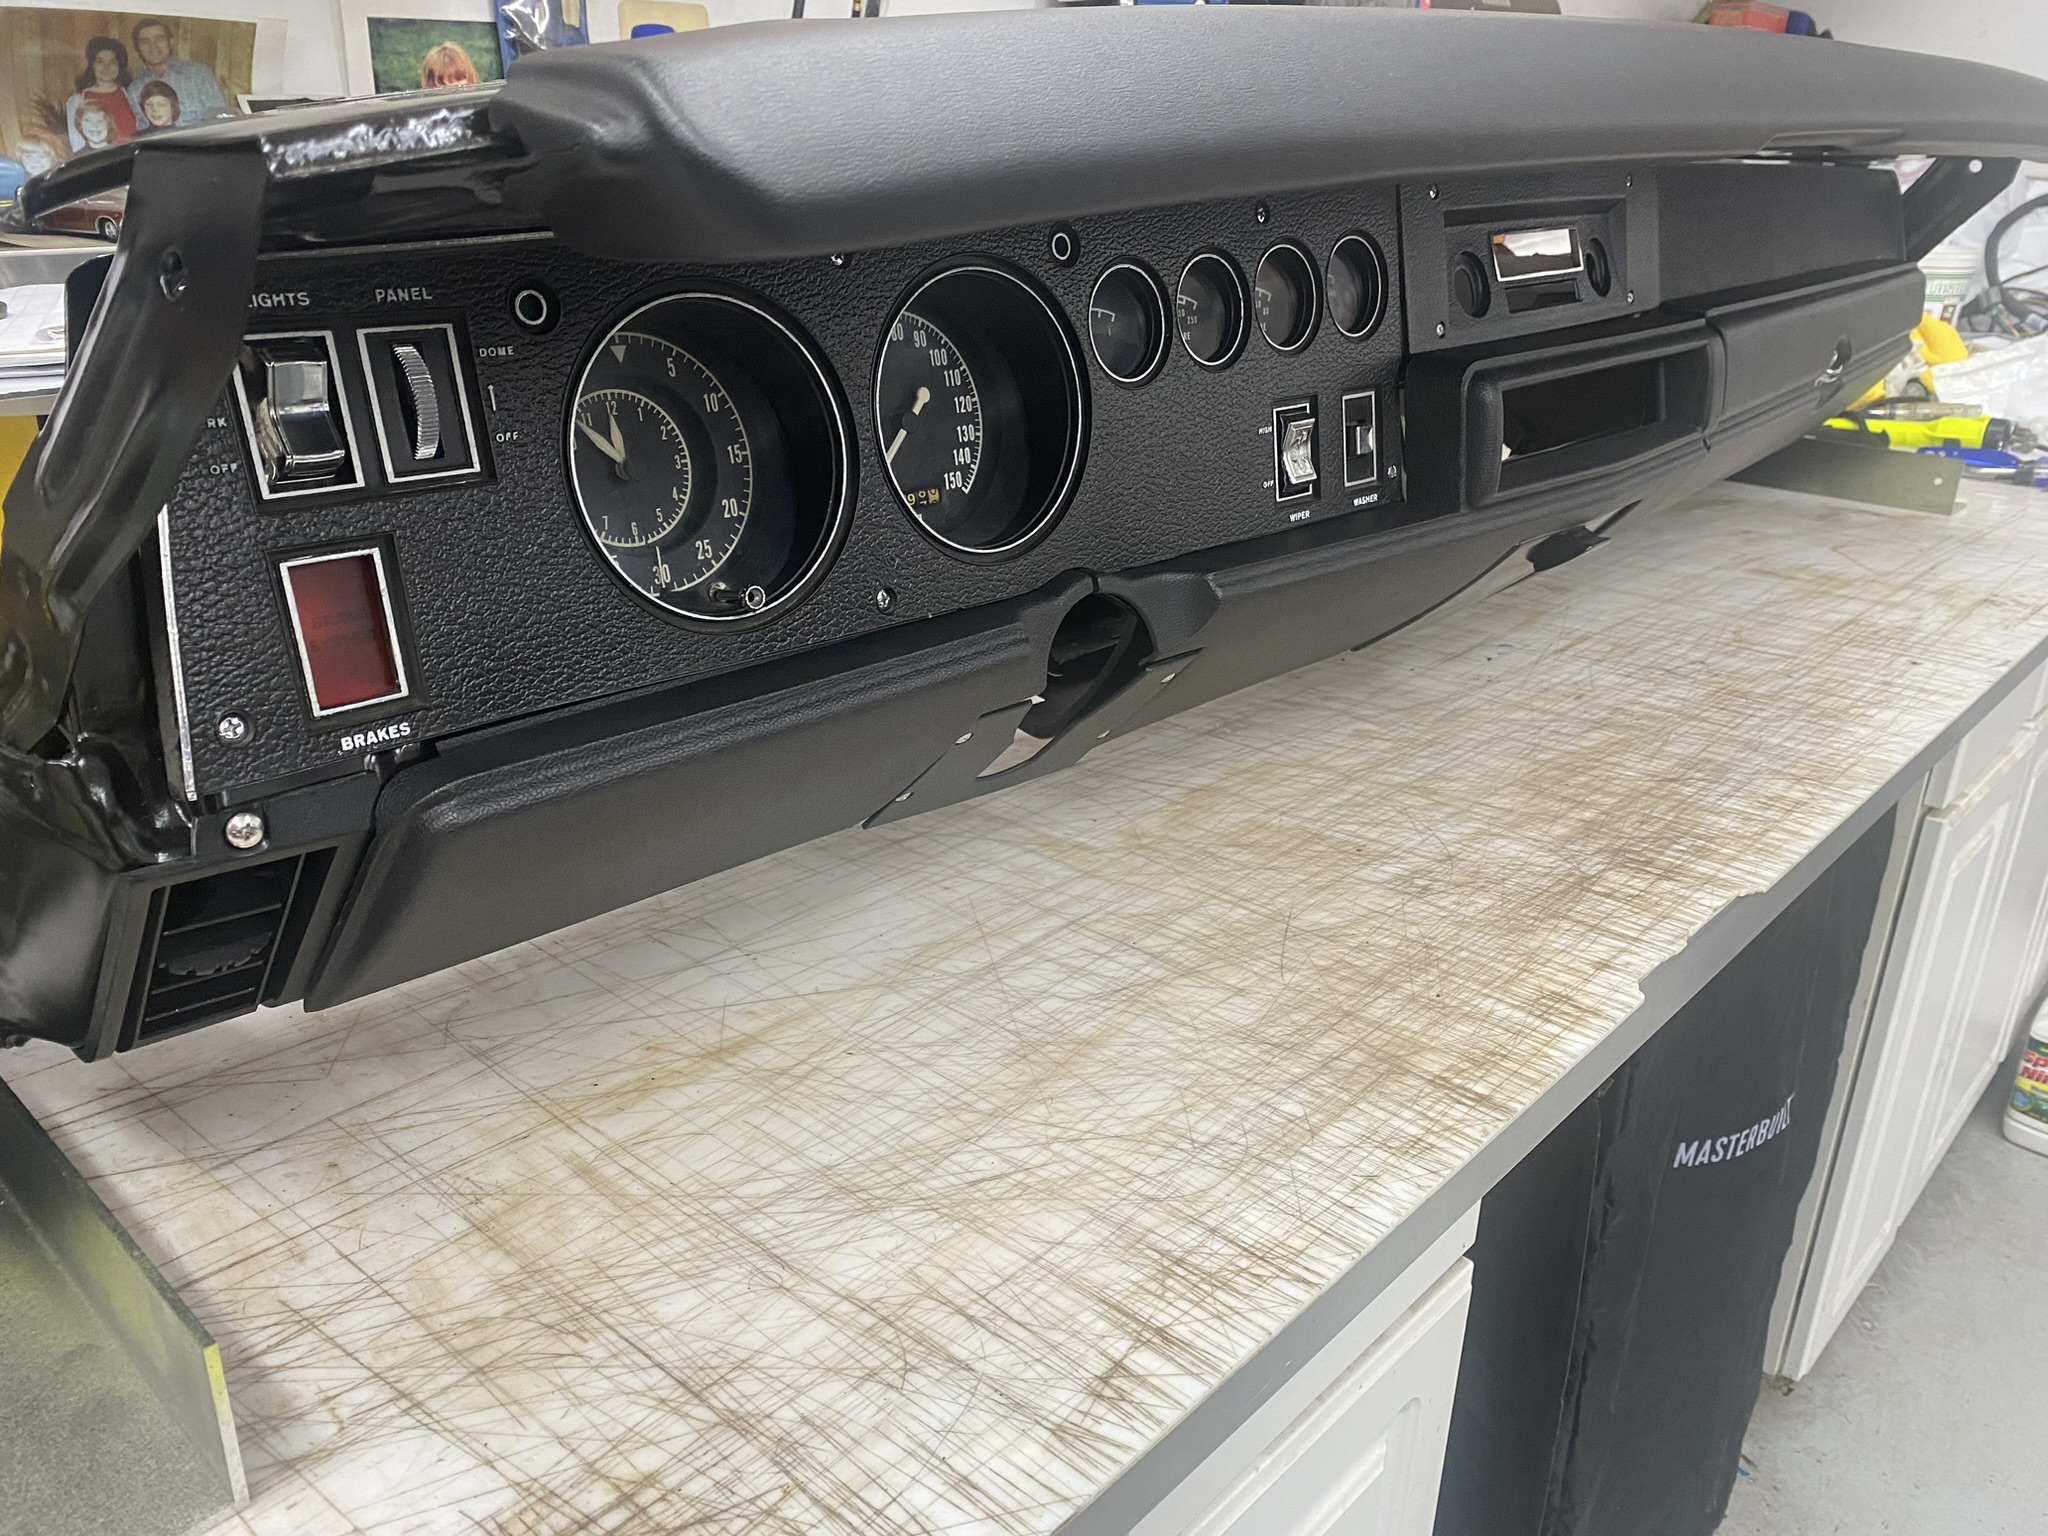
The Dashboard
This part by far took the longest to assemble. Every Single wire under there was replaced and tested. Making sure everything works properly was beyond tedious as the littlest of things such as speific clamps held back progress for months.
-
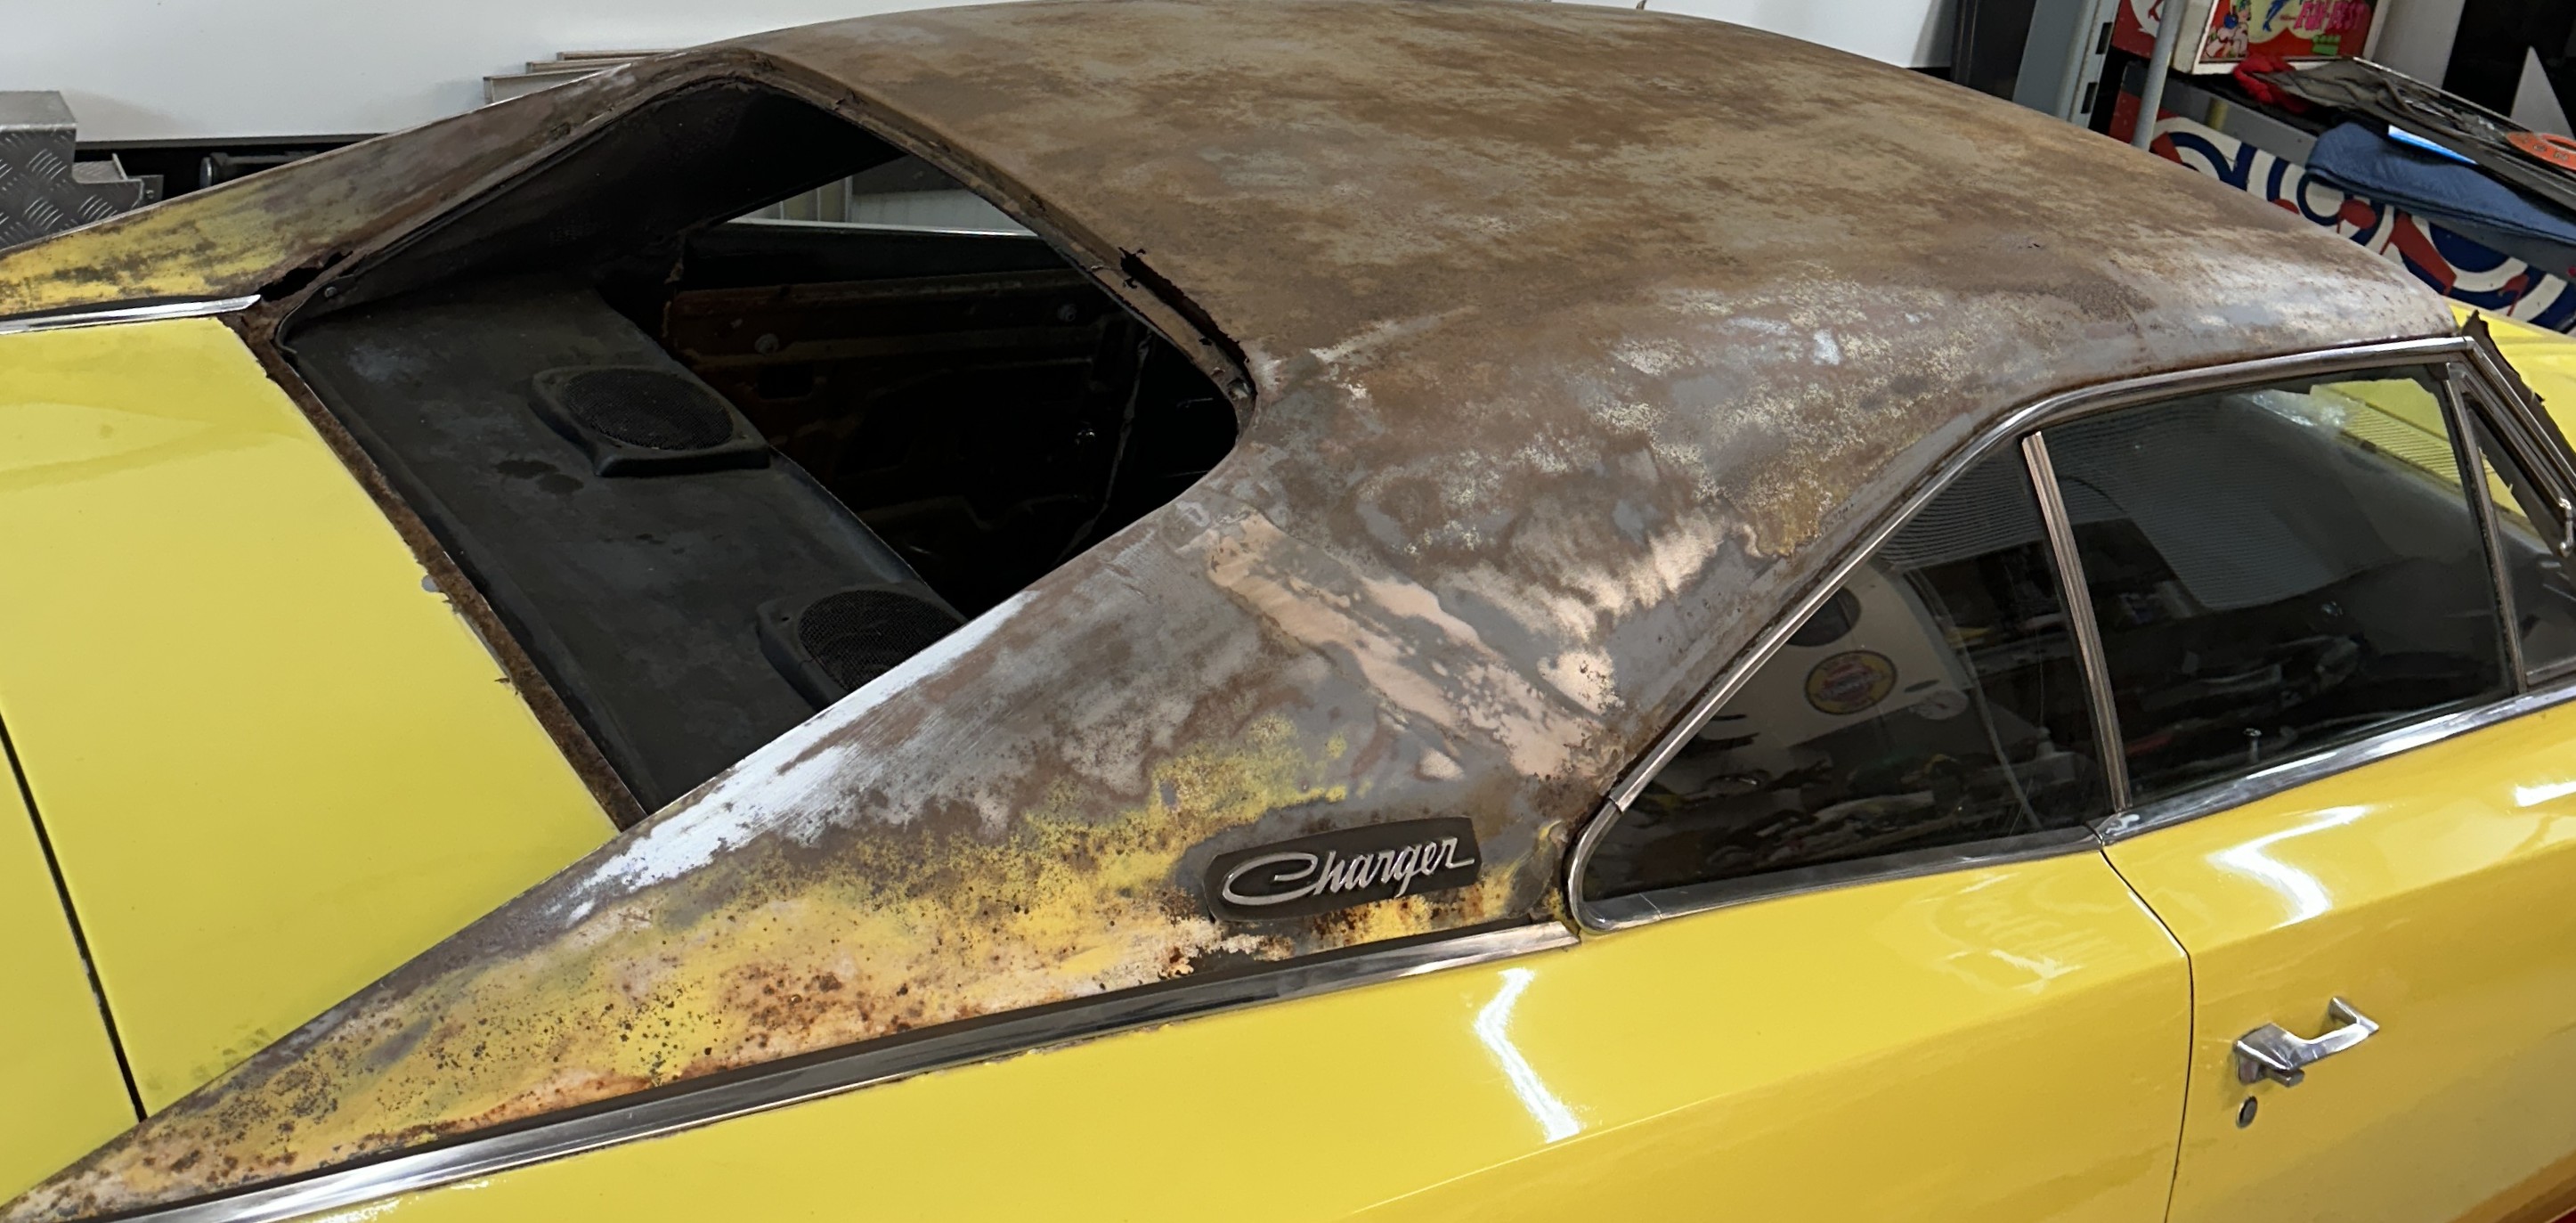
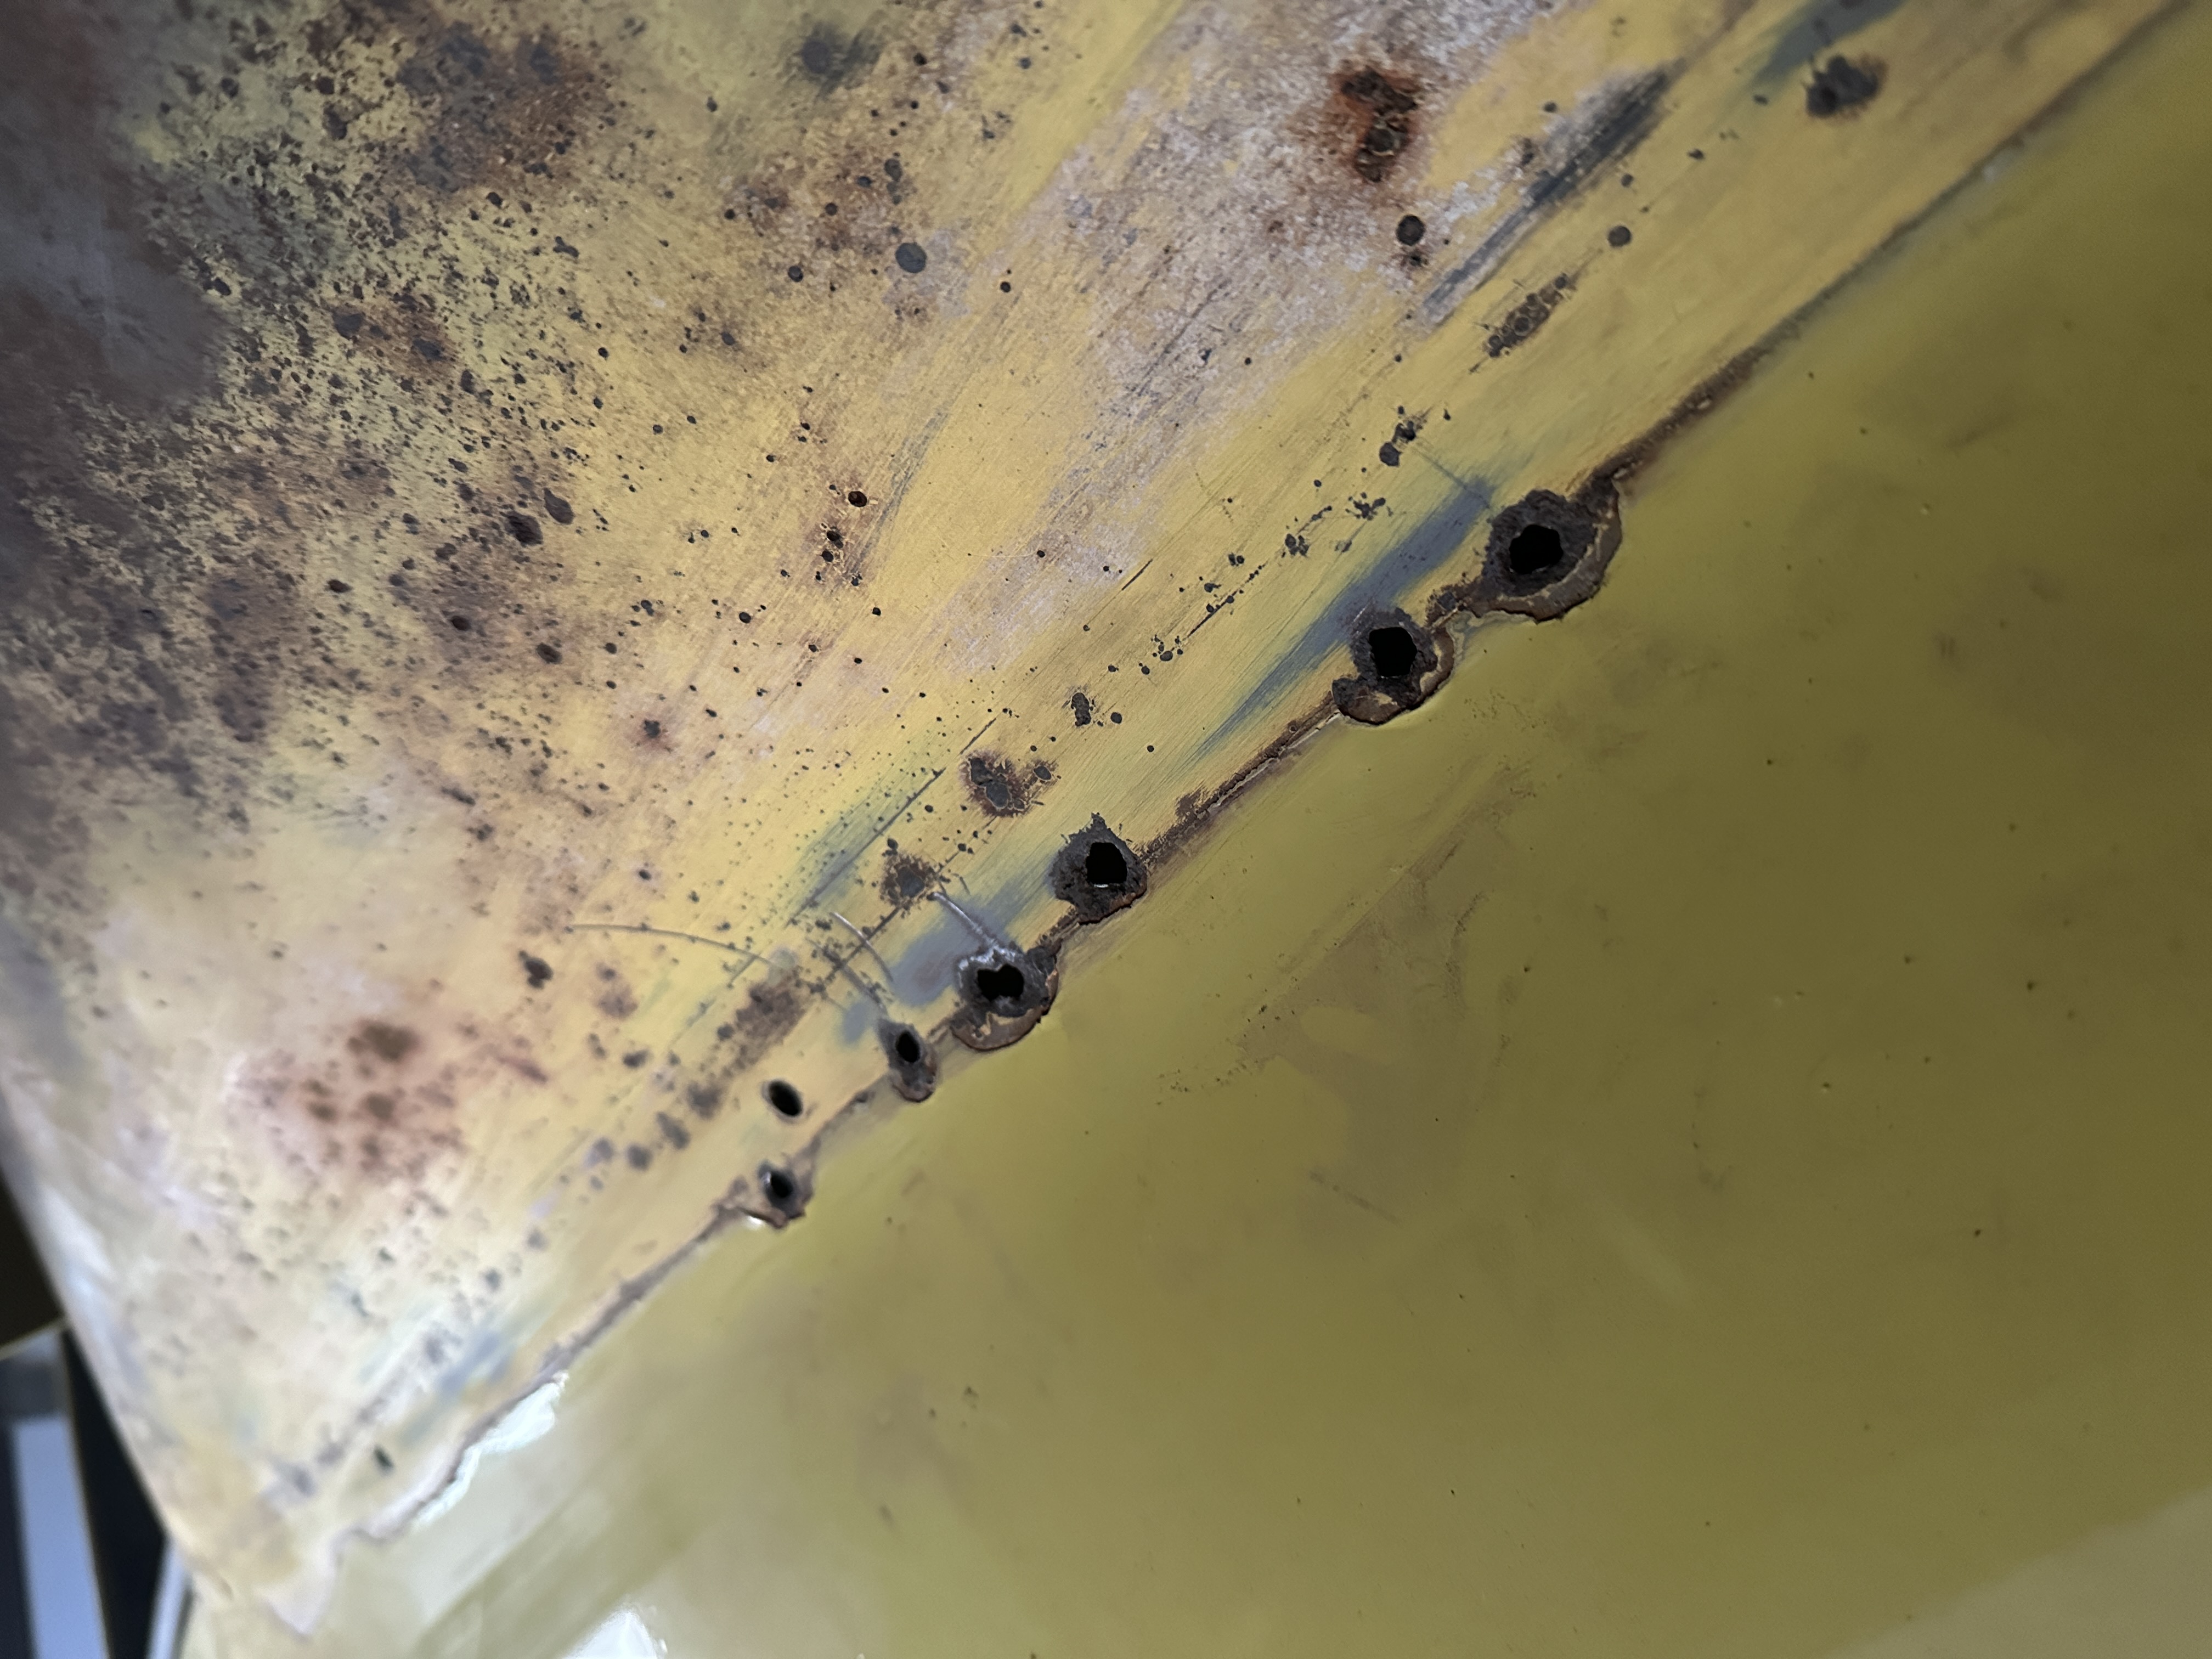
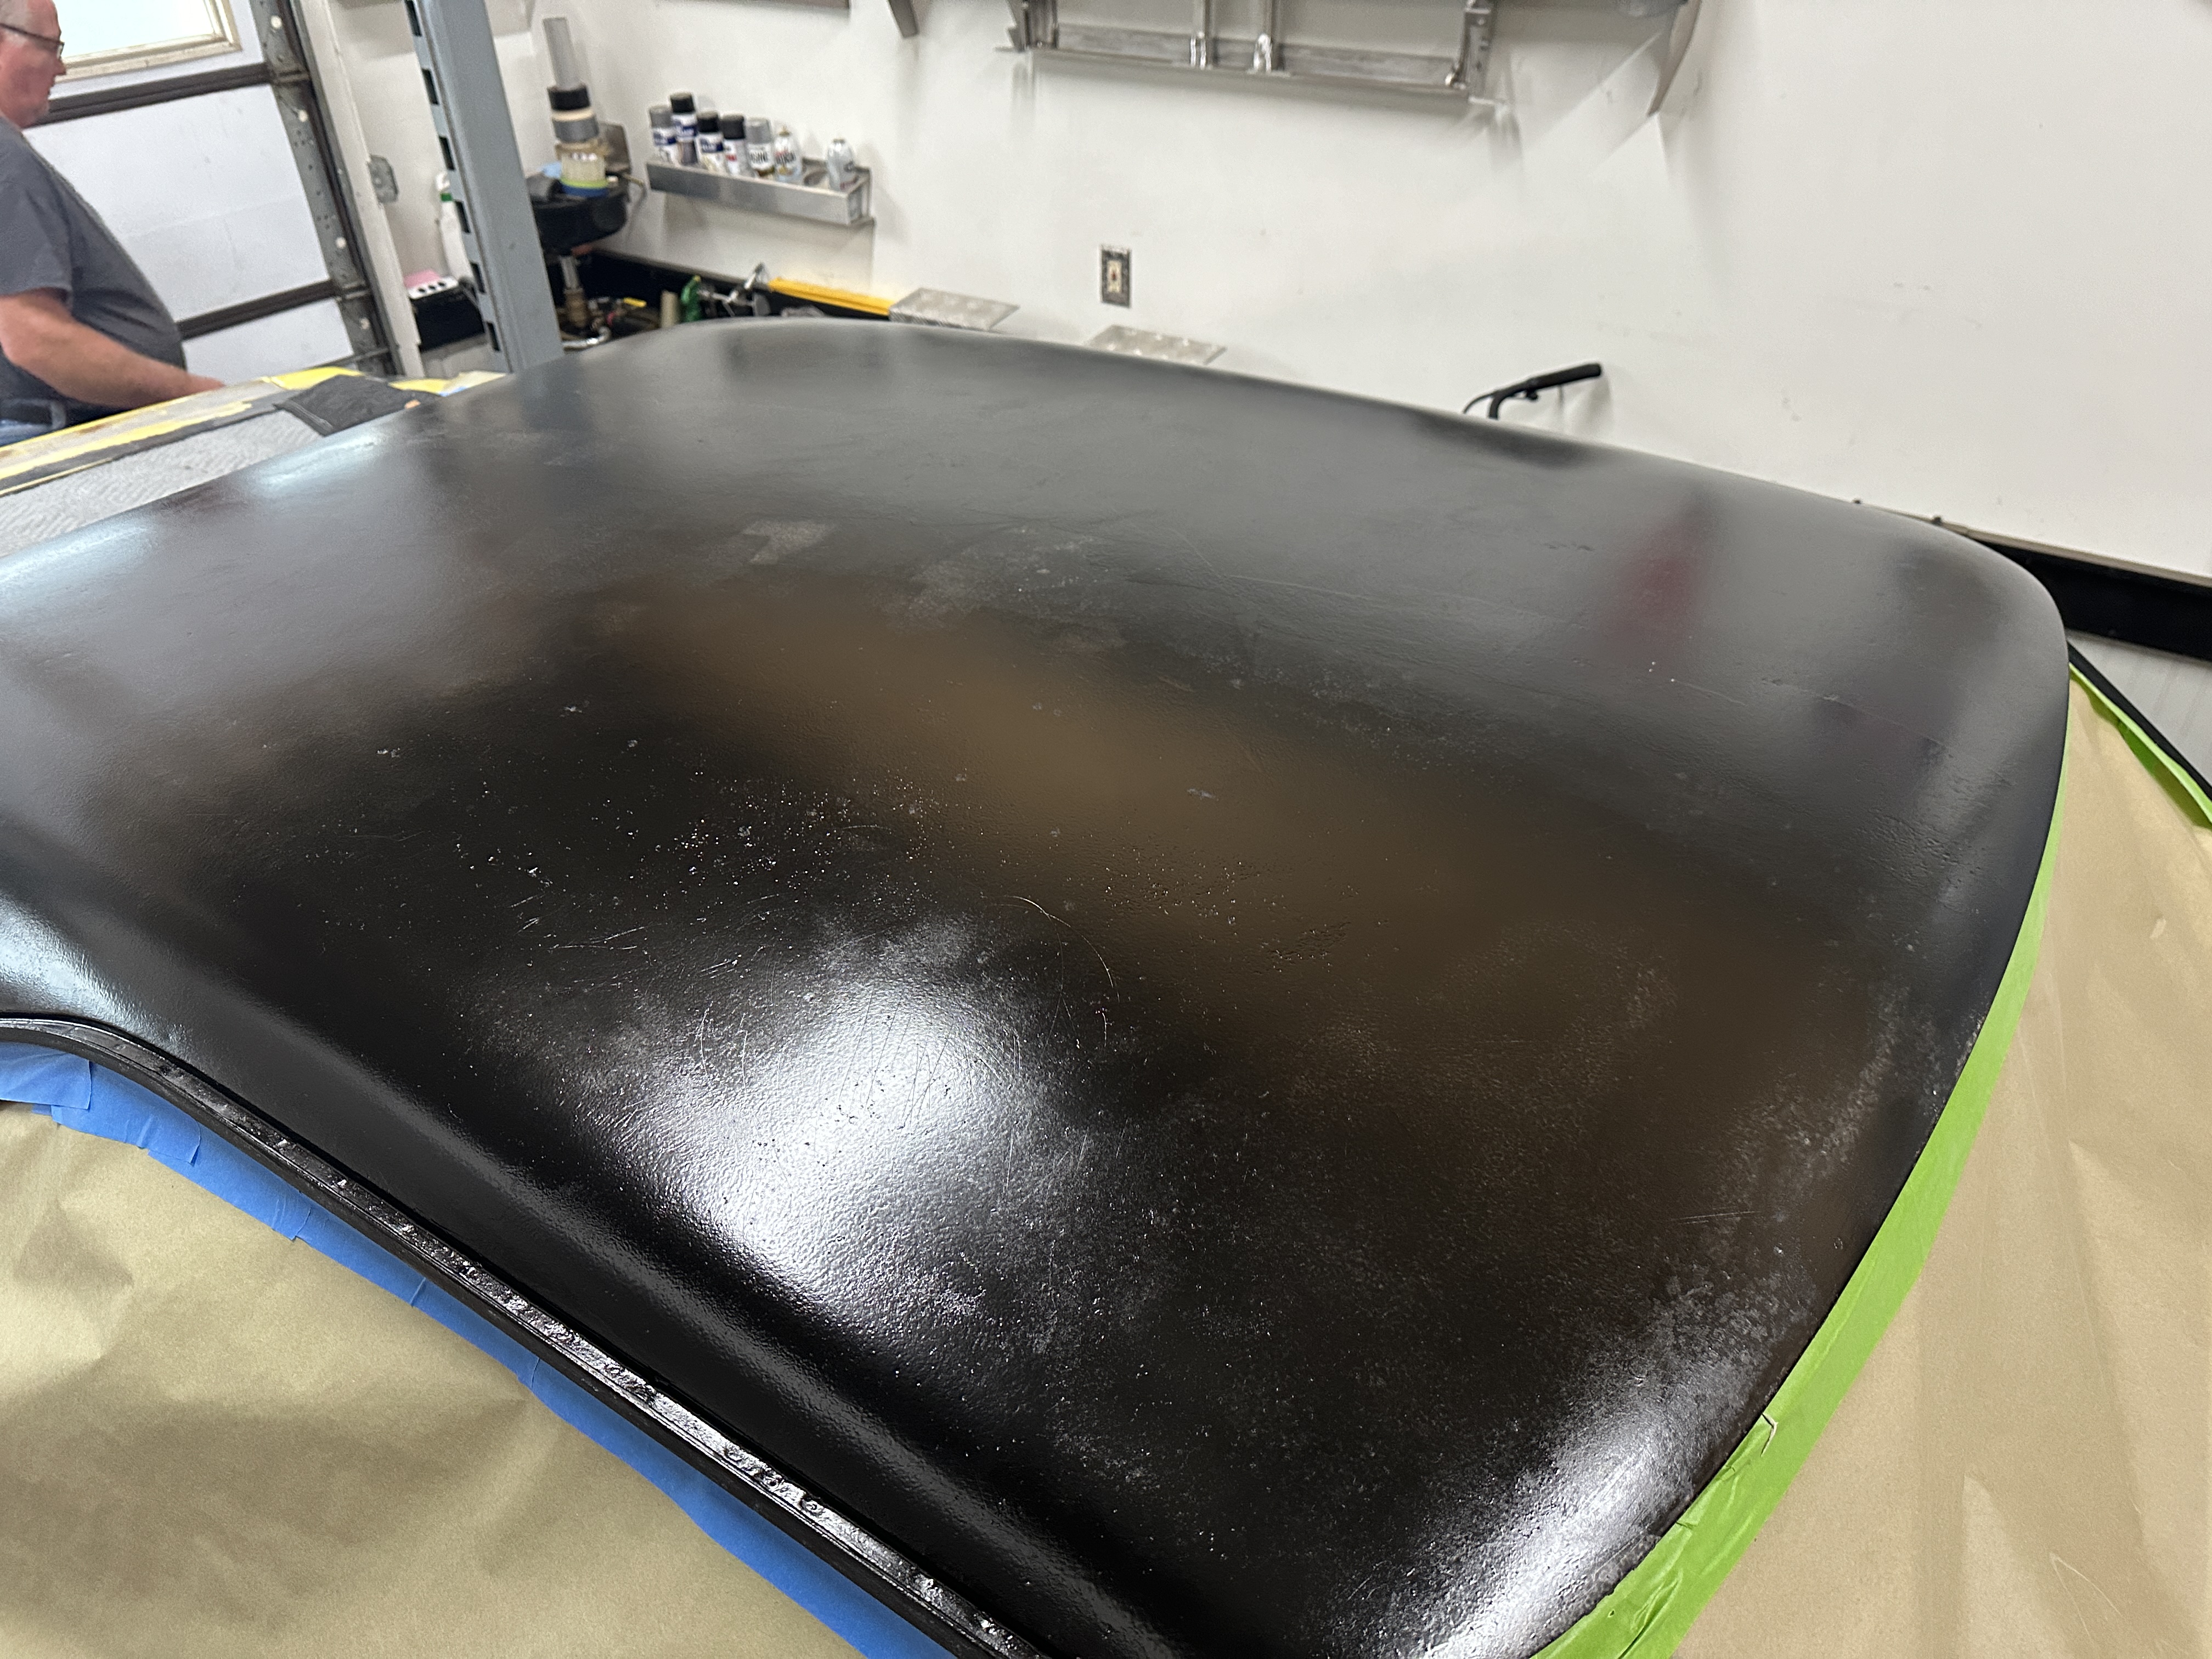
The Roof
Besides the Dashboard, the roof took an increidble amount of time to complete. The holes needed to be filled and the roughness needed to be sanded down and then resanded time and time again after bodywork to ensure smoothness.

Progression Photos